Showing posts with label Sharepoint List. Show all posts

Thursday, May 29, 2014

Filter OOTB SharePoint ListView web part using IWebPartRow connection Interface and WebControl.

Related Blog

In one of my old blogs I tried to explain the similar thing(Filter OOTB SharePoint ListView web part using IWebPartRow connection Interface.). The purpose of that blog was just show a simple way of using the IWebPartRow connection and a ListView WebPart.

Goal

In the current blog we will try and filter ListView WebPart using Connection object in IWebPartRow. Also there will be a RadioButtonList using which we can drill down the filter.

Create a custom list

  1. Site Actions > View All Site Content
  2. Create new List
  3. Custom List
  4. Name the list "Sample".
  5. Visit list settings and add new column "Year".
  6. Add a few sample data.
  7. Alter the "All Items" and add ID in the view.
  8. Now the list will look like below given image.

Web part for Conncetion

  1. Open Visual Stuido 2010
  2. Create new project
  3. Select "Web Part". Don't mistake using "Visual Web Part".
  4. Rename the WebPart1 to "SampleConnection".
  5. Use the below given code to be used as a sample.
#region System

using System;
using System.ComponentModel;
using System.Web;
using System.Web.UI;
using System.Web.UI.WebControls;
using System.Web.UI.WebControls.WebParts;
using Microsoft.SharePoint;
using Microsoft.SharePoint.WebControls;
using System.Data;
using System.Collections.Generic;

#endregion

namespace SampleConnection.SampleConnection
{
    [ToolboxItemAttribute(false)]
    public class SampleConnection : WebPart, IWebPartRow
    {

        #region Properties

        /// <summary>
        /// Radiobutton
        /// </summary>
        private RadioButtonList RbtnYear { get; set; }

        /// <summary>
        /// Year
        /// </summary>
        private int XYear
        {
            get
            {
                if (System.Web.HttpContext.Current.Request.QueryString["XYear"] == null)
                {
                    return 0;
                }
                return Convert.ToInt32(System.Web.HttpContext.Current.Request.QueryString["XYear"]);
            }
        }

        /// <summary>
        /// The Data table view for the Schema
        /// </summary>
        private DataTable XTable { get; set; }

        #endregion

        #region Constructor

        /// <summary>
        /// Creates the Schema of the table to get filtered column
        /// </summary>
        public SampleConnection()
        {
            RbtnYear = new RadioButtonList();
            RbtnYear.Items.Insert(0, new ListItem("2004"));
            RbtnYear.Items.Insert(1, new ListItem("2007"));            
            RbtnYear.RepeatDirection = RepeatDirection.Horizontal;
            RbtnYear.AutoPostBack = true;
            RbtnYear.SelectedIndexChanged += new EventHandler(RbtnYear_SelectedIndexChanged);

            //Create the object
            XTable = new DataTable();

            //Adds the columns which we require for filteration
            DataColumn col = new DataColumn();
            col.DataType = typeof(int);
            col.ColumnName = "Year";
            XTable.Columns.Add(col);

            //Use the columns to be added to get the Values to be filtered
            DataRow row = XTable.NewRow();
            if (XYear == 0)
            {
                row["Year"] = Convert.ToInt32(RbtnYear.Items[0].Value);
            }
            else
            {
                row["Year"] = XYear;            // Year to be filtered                
            }
            XTable.Rows.Add(row);
        }

        #endregion

        #region Events

        /// <summary>
        /// Radio Button Events
        /// </summary>
        /// <param name="sender"></param>
        /// <param name="e"></param>
        void RbtnYear_SelectedIndexChanged(object sender, EventArgs e)
        {
            //URL of the Page
            string _url = System.Web.HttpContext.Current.Request.Url.AbsolutePath;
            _url = string.Format("{0}?XYear={1}", _url, RbtnYear.SelectedValue);

            if (System.Web.HttpContext.Current.Request.QueryString.Count > 0)
            {
                for (int i = 0; i < System.Web.HttpContext.Current.Request.QueryString.Count; i = i + 1)
                {
                    //The xyear
                    if (string.Compare(System.Web.HttpContext.Current.Request.QueryString.GetKey(i), "XYear", true) == 0)
                    {
                        continue;
                    }

                    //Recreate the URL
                    _url = string.Format("{0}&{1}={2}", _url, System.Web.HttpContext.Current.Request.QueryString.GetKey(i), System.Web.HttpContext.Current.Request.QueryString[i]);
                }
            }

            //Send user back to page
            System.Web.HttpContext.Current.Response.Redirect(_url);
        }

        #endregion

        #region Methods

        /// <summary>
        /// Override child controls
        /// </summary>
        protected override void CreateChildControls()
        {
            base.CreateChildControls();

            //Add the radio button control
            this.Controls.Add(RbtnYear);
            RbtnYear.SelectedIndex = 0;
            if (XYear > 0)
            {
                if (RbtnYear.Items.FindByValue(XYear.ToString()) != null)
                {
                    RbtnYear.SelectedValue = XYear.ToString();
                }
            }
        }

        /// <summary>
        /// Connection provider and that assigns the Schema
        /// </summary>
        /// <returns></returns>
        [ConnectionProvider("Row")]
        public IWebPartRow GetConnectionInterface()
        {
            return new SampleConnection();
        }


        #endregion

        #region Implemented property & methods of IWebPartRow

        /// <summary>
        /// Gets data row view for ListView
        /// </summary>
        /// <param name="callback"></param>
        public void GetRowData(RowCallback callback)
        {
            callback(XTable.DefaultView[0]);
        }

        /// <summary>
        /// Schema for the ListView web part
        /// </summary>
        public PropertyDescriptorCollection Schema
        {
            get
            {
                return TypeDescriptor.GetProperties(XTable.DefaultView[0]);
            }
        }

        #endregion
    }
}

How to use?

  1. SharePoint Site > Edit a page.
  2. Click "Add a Web Part".
  3. Top ribbon > List and Libraries > Select "Sample".
  4. Again Click "Add a Web Part".
  5. Top ribbon > Custom > Select "SampleConnection" web part.
  6. The screen will have now 2 Web Parts. Check out the below given image.
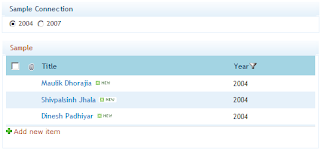
  7. This happens in Edit Mode of page only, so make sure the page is in Edit Mode. Have a look at the image below to select a connection web part.
  8. A box will popup to to select a filter. I will select Year. Click "Finish".
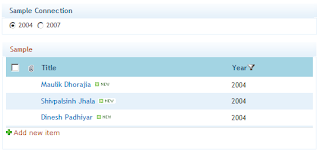
  9. Now to test this stuff. Select the year from the Year from the "Sample Connection" web part.

  10. So this was if a ListView needs filter. If we want to remove it. Just go through step 7 and click "Remove Connection" from the popup box. And the screen will be back to as it was.
Please let me know if this was helpful?

Sharepoint 2010 - Strange blog URL issue with site using Variations(Multilingual site). - REALLY WEIRD ISSUE!

Scenario/Symptoms

  • We have a site with variations. English/Spanish
  • Structure
    • Main Site > en > English Blog(Add 1 or 2 sample blogs)
    • Main Site > es > Spanish Blog(Add 1 or 2 sample blogs)
  • On the "Main Site" we added a "Content Query Web Part". Apply the below given setting.
  • Click on the link of any English blog. IT WORKS FINE!!!
  • Now click on the Spanish blog link. IT SAYS "PAGE NOT FOUND"!!!
  • Another way to get this is.
    • Go to the URL of Spanish blog site.
    • You can find the blogs on the page.
    • Click on the blog link IT SAYS "PAGE NOT FOUND"!!!.
    • Or navigate to "Administrar entradas de blog"(AllPosts.aspx). This page will show all the blogs in the list. Click on the blog link IT SAYS "PAGE NOT FOUND"!!!


Cause

We added a column to the list "Post". Now this small thing was causing the whole havoc.


Solution

There are 3 ways to
  1. Either don't add any column to list "Post". => BAD ONE
  2. Copy SharePoint Designer > Lists > Estrada De Blog and paste it there with name "Post". Don't delete the folder. Just need to duplicate and rename the folder.
  3. Read the blog => Sharepoint 2010 - Solution to blog URL issue with site using Variations(Multilingual site) to see the feature stapler solution for this issue.


Hope this helps. If you have any questions or a better solution, I am all open for it. Thanks for reading the blog.

Sharepoint 2010 - Solution to blog URL issue with site using Variations(Multilingual site).

Issue

Read this blog -> Sharepoint 2010 - Strange blog URL issue with site using Variations(Multilingual site). - REALLY WEIRD ISSUE!

Solution

  • Create a Feature Stapler.
  • Set the event scope as Scope="Site" as the feature.
  • Stapler > Element.xml.
    <?xml version="1.0" encoding="utf-8"?>
    <Elements xmlns="http://schemas.microsoft.com/sharepoint/">
        <FeatureSiteTemplateAssociation Id="edf698b1-30db-4d19-b46b-5efbb5dae9a5" TemplateName="Blog" />
    </Elements>
  • Please use the below given code as a solution for the problem.
#region System
using System;
using System.Security.Permissions;
using Microsoft.SharePoint;
using Microsoft.SharePoint.Security;
using Microsoft.SharePoint.Utilities;
using Microsoft.SharePoint.Workflow;
using Microsoft.SharePoint.Administration;
using System.IO;
using System.Linq;
#endregion

namespace FeatureStapler.VariationBlogSiteEvent
{
    /// <summary>
    /// Web Events
    /// </summary>
    public class VariationBlogSiteEvent : SPWebEventReceiver
    {
        #region Properties

        /// <summary>
        /// The site templates
        /// </summary>
        enum EnmSiteTemplate
        {
            BLOG,    //Blog Site
        }

        /// <summary>
        /// English Language
        /// </summary>
        enum EnmLangugeCode
        {
            English = 1033
        }

        #endregion

        #region Events

        /// <summary>
        /// A site was provisioned.
        /// </summary>
        public override void WebProvisioned(SPWebEventProperties properties)
        {
            base.WebProvisioned(properties);

            try
            {
                SPSecurity.RunWithElevatedPrivileges(delegate
                {
                    //Create a web object
                    SPWeb _web = properties.Web;

                    //Check and apply the settings
                    if (_web.WebTemplate == EnmSiteTemplate.BLOG.ToString() // If the site is a blog site
                        && _web.Language != (int)EnmLangugeCode.English) // Language Selected is not english
                    {
                        // Get the Library with correct folder
                        SPFolderCollection _folderInList = _web.Folders["Lists"].SubFolders;

                        //Find a folder with "post.aspx" & "newpost.aspx"
                        SPFolder _folderBlogNonEnglish = (from _folderX in _folderInList.Cast<SPFolder>()
                                                          let _fName = _folderX.Name
                                                          let _fCount = (from _fileX in _folderX.Files.Cast<SPFile>()
                                                                 where string.Compare( _fileX.Name , "post.aspx" , true ) == 0
                                                                select _fileX).Count()
                                                          where _fCount > 0
                                                          select _folderX).FirstOrDefault();

                        //So if any folder this properties exists
                        if (_folderBlogNonEnglish != null)
                        {
                            //The folder where file is going to come
                            SPFolder _folderBlogInEnglish = _folderBlogNonEnglish.ParentFolder.SubFolders.Add("Posts");
                            _folderBlogInEnglish.SubFolders.Add("Attachments");
                            _folderBlogInEnglish.SubFolders.Add("Post");

                            //Copy the files to new folder
                            foreach (SPFile _file in _folderBlogNonEnglish.Files)
                            {
                                _file.CopyTo(string.Format("{0}/{1}/{2}", _web.Url, _folderBlogInEnglish.Url, _file.Name), true);
                                ////Add a file
                                //_folderBlogInEnglish.Files.Add(_file.Name, File.OpenRead(_file), true);

                                // Commit 
                                _folderBlogInEnglish.Update();
                            }
                        }                       
                    }

                });
            }
            catch (Exception Exc)
            {
                SPDiagnosticsService.Local.WriteTrace(0, new SPDiagnosticsCategory("VariationBlogSiteEvent", TraceSeverity.Unexpected, EventSeverity.Error), TraceSeverity.Unexpected, Exc.Message, Exc.StackTrace);
            }
        }

        #endregion

    }
}


Hope this helps. If you have any questions or a better solution, I am all open for it. Thanks for reading the blog.

Tuesday, November 1, 2011

SharePoint 2010 - Use custom ItemStyle settings in Content Query Web Part.

Friends, I know many might find it easy to use the Custom Item Style for a Content Query Web Part. But, still I will try and explain a small process in a simplified way. Let's see if this is helpful for the starters.

Goal

The main goal is to use a Custom List name "Sample" and use a Content Query Web Part to show it with custom design style.

Process

  1. Create a custom list with name "Sample". The should just have 3 fields.
    1. Title - This is the main text to be shown for the picture.
    2. Picture - This is the hyperlink column for the picture of the item.
    3. Skills - This is a simple multiple line comment for the item.
  2. Go to any page. Add a web part. Drop a Content Query Web Part(CQWP) on the page from "Content Rollup".
  3. Click "Open tool pane".
  4. Content Query Tool Part > Query > Source > Show items from the following list: > Select "SAMPLE"
  5. Content Query Tool Part > Query > Presentation > Please see the picture as a default setting. I am going to leave it as it is.
  6. Click "Save" and the view of the web part will be a default text one which is going to look like picture below.
  7. On Clicking the picture it goes to the display record screen.

But now moving back to our goal. We need to show the data in a custom design layout. So follow the below given steps.
  1. Open a SharePoint 2010 designer.
  2. All Files > Style Library > XSL Style Sheets > ItemStyle.xsl(Edit it in advance mode)
  3. Find this element, copy it and paste it at the bottom of the XSL.
    <xsl:template name="Default" match="*" mode="itemstyle">...</xsl:template>
  4. Change the name and match to Sample.
    <xsl:template name="Sample" match="Row[@Style='Sample']" mode="itemstyle">...</xsl:template>
  5. Also if you edit the web part you can now see the item in the ItemStyle list. Make changes to map the correct fields too.

  6. Make the changes to the xsl(As you want the view of the list) or can copy the whole block and paste it at the bottom of the ItemStyle.xsl.
    <xsl:template name="Sample" match="Row[@Style='Sample']" mode="itemstyle">
            <xsl:variable name="SafeLinkUrl">
                <xsl:call-template name="OuterTemplate.GetSafeLink">
                    <xsl:with-param name="UrlColumnName" select="'LinkUrl'"/>
                </xsl:call-template>
            </xsl:variable>
            <xsl:variable name="SafeImageUrl">
                <xsl:call-template name="OuterTemplate.GetSafeStaticUrl">
                    <xsl:with-param name="UrlColumnName" select="'ImageUrl'"/>
                </xsl:call-template>
            </xsl:variable>
            <xsl:variable name="DisplayTitle">
                <xsl:call-template name="OuterTemplate.GetTitle">
                    <xsl:with-param name="Title" select="@Title"/>
                    <xsl:with-param name="UrlColumnName" select="'LinkUrl'"/>
                </xsl:call-template>
            </xsl:variable>
            <table cellpadding="0" cellspacing="5" border="0" style="border:1px Solid #efefef;width:400px;">
                <tr>
                    <td style="width:100px" align="center">
                        <a href="{$SafeLinkUrl}" title="{@LinkToolTip}">
                            <img class="image" src="{$SafeImageUrl}" title="{@ImageUrlAltText}" />
                        </a>
                    </td>
                    <td valign="top" align="left"><a href="{$SafeLinkUrl}" title="{@LinkToolTip}">
                      <xsl:if test="$ItemsHaveStreams = 'True'">
                        <xsl:attribute name="onclick">
                          <xsl:value-of select="@OnClickForWebRendering"/>
                        </xsl:attribute>
                      </xsl:if>
                      <xsl:if test="$ItemsHaveStreams != 'True' and @OpenInNewWindow = 'True'">
                        <xsl:attribute name="onclick">
                          <xsl:value-of disable-output-escaping="yes" select="$OnClickTargetAttribute"/>
                        </xsl:attribute>
                      </xsl:if>
                      <xsl:value-of select="$DisplayTitle"/>
                    </a><br /><xsl:value-of select="@Description" disable-output-escaping="yes" /></td>
                </tr>
            </table> 
        </xsl:template>
    
  7. Once you are done with that you can see the below given view on the screen.
  8. Thats it.


I have tried my best to keep this as simple as possible for freshers who are learning SharePoint.

Tuesday, September 27, 2011

Sharepoint 2010 Adding a "Publishing Image" to a Sharepoint List programmatically.

What is "Publishing Image" content type?

"Publishing Image" is a content type which will bind the image with all its properties and will show it on the screen with those properties applied. The properties like height width etc.


What my task was?

My task was to add a "Publishing Image" content type with Display Name as "Rollup Image" in the content type list "Post". This was a site level feature, once i activate this feature all the blog type site with SharePoint List "Post" will have an extra field "Rollup Image". Please have a look at the 2 pictures which can give you a clear idea.


The 1st from the above one is new post screen. and the 2nd one comes when you click to add a new image reference.


Solution

  1. Open a visual studio 2010
  2. Add new project
  3. Empty Sharepoint Project > Deploy as Farm Solution > Finish.
  4. In the visual studio solution project select "Features > Feature1 > Feature1.feature".
  5. Right click "Add event receiver".
  6. I used this code to achieve it.

    /// <summary>
    /// Add a field name "Rollup Image" to a content type "Post".
    /// "Post" is the content type used in the Site Template blog.
    /// </summary>
    /// <param name="properties"></param>
    public override void FeatureActivated(SPFeatureReceiverProperties properties)
    {
        SPSecurity.RunWithElevatedPrivileges(delegate
        {
            using (SPWeb _web = ((SPSite)properties.Feature.Parent).RootWeb)
            {
                //Post is the content type list which is on the blogs.
                SPContentType _contentType = _web.ContentTypes["Post"];
    
                if (_contentType != null)
                {
                    //PublishingRollupImage is the static name for the "Publishing Image "
                    if (!_contentType.Fields.ContainsFieldWithStaticName("PublishingRollupImage"))
                    {
                        //Name of the column to be added to the list content type post
                        SPField _field = _web.AvailableFields["Rollup Image"];
                        SPFieldLink _fieldText = new SPFieldLink(_field);
    
                        if (_contentType.FieldLinks[_fieldText.Id] == null)
                        {
                            _contentType.FieldLinks.Add(_fieldText);
                        }
                        _contentType.Update(true);
                    }
                }
            }
        });
    }
  7. Deploy the solution.


How to verify this?

  1. Open the Sharepoint Site.
  2. Site Actions > Site Settings > Site Content Types
  3. Click "Post" in "List Content Type".
  4. You can see the newly added column in the image below. For checking the above 2 images you should go to the "Post" sharepoint list in the blog site.


Please feel free to ask question, I will be more glad to answer your question.

Sharepoint 2010 Enabling "Target Audience" programmatically for Sharepoint List

In this blog i have tried and explained how enable the "Target Audience" using C# for a list. But first I will show you how to enable manually.


Why do we have to enable "Target Audience" field?

To filter the data using audience in Content Query Web Part we have to enable this feature.


Manually

  1. Go to Sharepoint Site
  2. Site Actions > View All Site Content
  3. Select the SharePoint List you want to enable target audience.
  4. List Settings > Audience targeting settings
  5. Select the check box and save.
  6. This will add a field name "Target Audience" in the list.
  7. You can now give Item level target audience.

Programmatically

  1. In the event receiver where you are creating a Sharepoint List.
  2. Just use the code given below.
    #region Enable Target Audience
    
    XmlElement _fldElement = new XmlDocument().CreateElement("Field");
    _fldElement.SetAttribute("ID", "{61cbb965-1e04-4273-b658-eedaa662f48d}");
    _fldElement.SetAttribute("Type", "TargetTo");
    _fldElement.SetAttribute("Name", "Target_x0020_Audiences");
    _fldElement.SetAttribute("StaticName", "Target_x0020_Audiences");
    _fldElement.SetAttribute("DisplayName", "Target Audiences");
    _fldElement.SetAttribute("Required", "FALSE");
    _list.Fields.AddFieldAsXml(_fldElement.OuterXml);
    
    _list.Update();
    
    #endregion
  3. That should be it. See to the list if that column is there!

Thank you and hoping the blog helped you.

Wednesday, August 31, 2011

"User Information List" instead of "UserProfileManager"

For all those friends who were trying to find out an option for "UserProfileManger" to get the information of user, I found "User Information List" on the root. I am still not sure if it gets sync directly to the active directory or any other user list. But will write a blog on this in future once i find it.

Tuesday, August 30, 2011

Problem creating or deleting Sharepoint List in Visual Web Part's Feature Receiver when called from stsadm or powershell.

Summary of Issue.

Working Process
In a Visual Studio Web Part, I was trying to create a Sharepoint List using a Feature Receiver Event. Every thing works fine when I deployed the solution using Visual Studio 2010.

Problem
I tried deploying the solution using STSADM Command or Powershell scripts. The deployment went fine but the Sharepoint List was not getting created. After research I found out the issue was in the activation code. I was using SPContext.Current.Web.Url. Now the correct way to do this is mentioned below.


If the Feature Scope="Web"


public override void FeatureActivated(SPFeatureReceiverProperties properties)
{
SPSecurity.RunWithElevatedPrivileges(delegate
{
SPWeb _web = (SPWeb)properties.Feature.Parent;
});
}


If the Feature Scope="Site"


public override void FeatureActivated(SPFeatureReceiverProperties properties)
{
SPSecurity.RunWithElevatedPrivileges(delegate
{
SPSite _site = (SPSite)properties.Feature.Parent;
});
}


Hope you find this helpfull. Please comment if you have any queries.

Monday, June 13, 2011

Sharepoint 2010 Customize Paging in XSLTListViewWebPart

The blog explains to add paging to our XSLTListViewWebPart in Sharepoint 2010.

  1. Create a customized html by going through one of my last blog. Click here to read my last blog.
  2. Once you have the html. There are few small things you need to keep in mind.
    1. Control your page size from the tag given below.
      <RowLimit Paged="TRUE">2</RowLimit>
    2. There are 3 major templates which you need to take care of for the paging. There will be an attribute "ddwrt:ghost="hide"" in all 3 of them. Remove them from it as it wont allow your template to get into shape.
      <xsl:template name="pagingButtons">
      <xsl:template name="CommandFooter">
      <xsl:template name="Navigation">
      
    3. In the template name Naviagtion, You can delete everything for customization, but not "id="bottomPagingCell{$WPQ}"". You will have to assign that to any element.
  3. Call the template from main row.
    <xsl:call-template name="pagingButtons" />
  4. Here are the images with myself customizing the paging.
  5. Have a look at the view what i have created for the custom paging. Below given xsl style is the complete working example for the screenshots above.
<xsl:stylesheet xmlns:x="http://www.w3.org/2001/XMLSchema" xmlns:d="http://schemas.microsoft.com/sharepoint/dsp"
    version="1.0" exclude-result-prefixes="xsl msxsl ddwrt" xmlns:ddwrt="http://schemas.microsoft.com/WebParts/v2/DataView/runtime"
    xmlns:asp="http://schemas.microsoft.com/ASPNET/20" xmlns:__designer="http://schemas.microsoft.com/WebParts/v2/DataView/designer"
    xmlns:xsl="http://www.w3.org/1999/XSL/Transform" xmlns:msxsl="urn:schemas-microsoft-com:xslt"
    xmlns:sharepoint="Microsoft.SharePoint.WebControls" xmlns:ddwrt2="urn:frontpage:internal"
    xmlns:o="urn:schemas-microsoft-com:office:office" ddwrt:ghost="show_all">
  <xsl:include href="/_layouts/xsl/main.xsl" />
  <xsl:include href="/_layouts/xsl/internal.xsl" />
  <xsl:output method="xml" version="1.0" encoding="UTF-8" indent="yes" />
  <xsl:output method='html' indent='yes' />
  <xsl:template match="/" xmlns:x="http://www.w3.org/2001/XMLSchema" xmlns:d="http://schemas.microsoft.com/sharepoint/dsp"
       xmlns:asp="http://schemas.microsoft.com/ASPNET/20" xmlns:__designer="http://schemas.microsoft.com/WebParts/v2/DataView/designer"
       xmlns:sharepoint="Microsoft.SharePoint.WebControls" xmlns:o="urn:schemas-microsoft-com:office:office"
       ddwrt:ghost="" xmlns:ddwrt="http://schemas.microsoft.com/WebParts/v2/DataView/runtime">
    <xsl:variable name="Rows" select="/dsQueryResponse/Rows/Row[$EntityName = '' or (position() &gt;= $FirstRow and position() &lt;= $LastRow)]" />
    <table cellpadding="10" cellspacing="0" border="1" style="padding:25px;">
      <tr>
        <td colspan='2'>
          <b style="font-size:25px;">Friend's List</b>
        </td>
      </tr>
      <xsl:for-each select="$Rows">
        <xsl:call-template name="RowView">
        </xsl:call-template>
      </xsl:for-each>
      <tr>
          <td colspan="2"><xsl:call-template name="pagingButtons" /></td>
      </tr>
    </table>    
  </xsl:template>

  <xsl:template name="RowView">
   <xsl:variable name="thisNode" select="." />
    <tr>
      <td align="center">
        <img style="height:100px;border:5px solid #888;">
          <xsl:attribute name="src">
            <xsl:value-of select="@Picture"></xsl:value-of>
          </xsl:attribute>
          
          <xsl:attribute name="alt">
            <xsl:value-of select="@Title"></xsl:value-of>
          </xsl:attribute>
        
        </img>
      </td>
      <td valign="top">
        <b>Name : </b>
        <xsl:value-of select="@Title"></xsl:value-of>
        <br></br>
        <b>Email : </b>
        <xsl:value-of select="@Email" disable-output-escaping="yes"></xsl:value-of>
        <br></br>
        <b>Address :</b>
        <br></br>
        <blockquote>
          <xsl:value-of select="@Address" disable-output-escaping="yes"></xsl:value-of>
        </blockquote>
      </td>
    </tr>
  </xsl:template>
  
  <xsl:template name="pagingButtons">
    <xsl:choose>
          <xsl:when test="$XmlDefinition/List/@TemplateType = 106 and $XmlDefinition/@RecurrenceRowset='TRUE'">
            <xsl:if test="$dvt_nextpagedata or $dvt_prevpagedata">
                  <xsl:call-template name="CalendarExpandedRecurrenceFooter"/>
        </xsl:if>
      </xsl:when>
          <xsl:otherwise>
              <xsl:if test="$XmlDefinition/RowLimit[@Paged='TRUE']">
                <xsl:call-template name="CommandFooter">
                      <xsl:with-param name="FirstRow" select="$FirstRow" />
                      <xsl:with-param name="LastRow" select="$LastRow" />
                      <xsl:with-param name="dvt_RowCount" select="$dvt_RowCount" />
                </xsl:call-template>
      </xsl:if>
      </xsl:otherwise>
    </xsl:choose>
  </xsl:template>
  <xsl:template name="CommandFooter">
    <xsl:param name="FirstRow" select="1"/>
    <xsl:param name="LastRow" select="1"/>
    <xsl:param name="dvt_RowCount" select="1"/>
    <xsl:if test="$FirstRow &gt; 1 or $dvt_nextpagedata">
          <xsl:call-template name="Navigation">
            <xsl:with-param name="FirstRow" select="$FirstRow" />
            <xsl:with-param name="LastRow" select="$LastRow" />
            <xsl:with-param name="dvt_RowCount" select="$dvt_RowCount" />
          </xsl:call-template>
    </xsl:if>
  </xsl:template><xsl:template name="Navigation">
    <xsl:param name="FirstRow" select="1"/>
    <xsl:param name="LastRow" select="1"/>
    <xsl:param name="dvt_RowCount" select="1"/>
    <xsl:variable name="LastRowValue">
        <xsl:choose>
            <xsl:when test="$EntityName = '' or $LastRow &lt; $RowTotalCount">
              <xsl:value-of select="$LastRow"/>    
            </xsl:when>
            <xsl:otherwise>
              <xsl:value-of select="$RowTotalCount"/>
            </xsl:otherwise>
        </xsl:choose>
    </xsl:variable>
    <xsl:variable name="NextRow">
      <xsl:value-of select="$LastRowValue + 1"/>
    </xsl:variable>
        <table id="bottomPagingCell{$WPQ}" style="font-size:25px;width:100%;padding:5px;" border="0">
            <tr>
                            <td style="width:50%">
                <xsl:if test="$dvt_firstrow &gt; 1">
                  <a>
                    <xsl:choose>
                          <xsl:when test="$dvt_RowCount = 0 and not($NoAJAX)">
                            <xsl:attribute name="onclick">javascript:RefreshPageTo(event, "<xsl:value-of select="$PagePath"/>?<xsl:value-of select="$ShowWebPart"/>\u0026<xsl:value-of select='$FieldSortParam'/><xsl:value-of select='$SortQueryString'/>\u0026View=<xsl:value-of select="$View"/>");javascript:return false;</xsl:attribute>
                            <xsl:attribute name="href">javascript:</xsl:attribute>
                        <img src="/_layouts/{$LCID}/images/prev.gif" border="0" alt="{$Rows/@idRewind}" />
                        <img src="/_layouts/{$LCID}/images/prev.gif" border="0" alt="{$Rows/@idRewind}" />
                      </xsl:when>
                          <xsl:otherwise>
                            <xsl:variable name="RealRowLimit">
                                  <xsl:choose>
                                    <xsl:when test="$XmlDefinition/Query/GroupBy[@Collapse='TRUE']/@GroupLimit">
                              <xsl:value-of select ="$XmlDefinition/Query/GroupBy[@Collapse='TRUE']/@GroupLimit"/>
                            </xsl:when>
                                    <xsl:otherwise>
                              <xsl:value-of select = "$XmlDefinition/RowLimit"/>
                            </xsl:otherwise>
                                  </xsl:choose>
                        </xsl:variable>
                            <xsl:choose>
                                  <xsl:when test="not($NoAJAX)">
                                    <xsl:attribute name="onclick">javascript:RefreshPageTo(event, "<xsl:value-of select="$PagePath"/>?<xsl:value-of select="$dvt_prevpagedata"/><xsl:value-of select="$ShowWebPart"/>\u0026PageFirstRow=<xsl:value-of select="$FirstRow - $RealRowLimit"/>\u0026<xsl:value-of select='$FieldSortParam'/><xsl:value-of select='$SortQueryString'/>\u0026View=<xsl:value-of select="$View"/>");javascript:return false;</xsl:attribute>
                                    <xsl:attribute name="href">javascript:</xsl:attribute>
                          </xsl:when>
                                  <xsl:otherwise>
                                    <xsl:attribute name="href">
                              javascript: <xsl:call-template name="GenFireServerEvent">
                                            <xsl:with-param name="param" select="concat('dvt_firstrow={',$FirstRow - $XmlDefinition/RowLimit,'};dvt_startposition={',$dvt_prevpagedata,'}')"/>
                                          </xsl:call-template>
                            </xsl:attribute>
                          </xsl:otherwise>
                            </xsl:choose>
                        <img src="/_layouts/{$LCID}/images/prev.gif" border="0" alt="{$Rows/@idPrevious}" />Pre
                      </xsl:otherwise>
                    </xsl:choose>
                  </a>
              </xsl:if>
            </td>
            
                 <td style="width:50%" align="right">
                  <xsl:if test="$LastRowValue &lt; $dvt_RowCount or string-length($dvt_nextpagedata)!=0">

                  <a>
                    <xsl:choose>
                          <xsl:when test="not($NoAJAX)">
                            <xsl:attribute name="onclick">javascript:RefreshPageTo(event, "<xsl:value-of select="$PagePath"/>?<xsl:value-of select="$dvt_nextpagedata"/><xsl:value-of select="$ShowWebPart"/>\u0026PageFirstRow=<xsl:value-of select="$NextRow"/>\u0026<xsl:value-of select='$FieldSortParam'/><xsl:value-of select='$SortQueryString'/>\u0026View=<xsl:value-of select="$View"/>");javascript:return false;</xsl:attribute>
                            <xsl:attribute name="href">javascript:</xsl:attribute>
                      </xsl:when>
                          <xsl:otherwise>
                            <xsl:attribute name="href">javascript: <xsl:call-template name="GenFireServerEvent">
                                <xsl:with-param name="param" select="concat('dvt_firstrow={',$NextRow,'};dvt_startposition={',$dvt_nextpagedata,'}')"/>
                                  </xsl:call-template>
                        </xsl:attribute>
                      </xsl:otherwise>
                    </xsl:choose>
                    Next<img src="/_layouts/{$LCID}/images/next.gif" border="0" alt="{$Rows/@tb_nextpage}" />
                  </a>
              </xsl:if>
              </td>
            </tr>            
        </table>
    
    <xsl:if test="not($GroupingRender)">
    <script>
      var topPagingCell = document.getElementById(&quot;topPagingCell<xsl:value-of select="$WPQ" />&quot;);
      var bottomPagingCell = document.getElementById(&quot;bottomPagingCell<xsl:value-of select="$WPQ" />&quot;);
      if (topPagingCell != null &amp;&amp; bottomPagingCell != null)
      {
      topPagingCell.innerHTML = bottomPagingCell.innerHTML;
      }
    </script>
    </xsl:if>
  </xsl:template>
  </xsl:stylesheet>

Saturday, June 4, 2011

Removing HTML tags using XSLT.

We have faced issues many times in XSLT when we require just to show text and no html content. So here is the solution. Call the template "remove-html" with passing the content and this will do it.


<!-- Calling the template that removes tag -->
<xsl:call-template name="remove-html">
<xsl:with-param name="text" select="{HtmlBody}"/>
</xsl:call-template>
<!-- This will remove the tag -->
<xsl:template name="remove-html">
<xsl:param name="text"/>
<xsl:choose>
<xsl:when test="contains($text, '&lt;')">
<xsl:value-of select="substring-before($text, '&lt;')"/>
<xsl:call-template name="remove-html">
<xsl:with-param name="text" select="substring-after($text, '&gt;')"/>
</xsl:call-template>
</xsl:when>
<xsl:otherwise>
<xsl:value-of select="$text"/>
</xsl:otherwise>
</xsl:choose>
</xsl:template>

Sharepoint 2010 XSLTListViewWebPart using xsllink path.

In my last post i explained how to customize html for XSLTListViewWebPart. Click Here to read the post. In the current blog i will take the same example and show you how to use the same template for multiple XSLTListViewWebParts. Throughout the application.


  1. Create a list with name "Sample". Add the fields

    • Name

    • Address

    • Email

    • Picture


  2. Go back to screen and add some data.

  3. Adding the data will give you the default look. As I mentioned above that the default look is a XSLTListViewWebPart.

  4. I will propose below given template design for viewing.

  5. Create a file with title "Sample.xsl". Copy the content and paste it in file.

    <xsl:stylesheet version="1.0"
    xmlns:xsl="http://www.w3.org/1999/XSL/Transform"
    xmlns:msxsl="urn:schemas-microsoft-com:xslt"
    exclude-result-prefixes="msxsl" xmlns:ddwrt2="urn:frontpage:internal">

    <xsl:output method='html' indent='yes'/>

    <xsl:template match='dsQueryResponse'>
    <table cellpadding="10" cellspacing="0" border="1" style="padding:25px;">
    <tr>
    <td colspan='2'>
    <b style="font-size:25px;">Friend's List</b>
    </td>
    </tr>
    <xsl:apply-templates select='Rows/Row'/>
    </table>
    </xsl:template>

    <xsl:template match='Row'>
    <tr>
    <td align="center">
    <img style="height:100px;border:5px solid #888;">
    <xsl:attribute name="src">
    <xsl:value-of select="@Picture"></xsl:value-of>
    </xsl:attribute>
    <xsl:attribute name="alt">
    <xsl:value-of select="@Title"></xsl:value-of>
    </xsl:attribute>
    </img>
    </td>
    <td valign="top">
    <b>Name : </b><xsl:value-of select="@Title"></xsl:value-of><br></br>
    <b>Email : </b><xsl:value-of select="@Email" disable-output-escaping="yes"></xsl:value-of><br></br>
    <b>Address :</b><br></br>
    <blockquote><xsl:value-of select="@Address" disable-output-escaping="yes"></xsl:value-of></blockquote>
    </td>
    </tr>
    </xsl:template>
    </xsl:stylesheet>


  6. Upload the XSL file on any of the "Document Library" or "Style Library" and copy the http path of that file. In my case it's "/Style%20Library/Sample.xsl".

  7. Open the current website in "Sharepoint Designer 2010".

  8. Goto "Links and Libraries".

  9. Find the list and click it. On the right hand side in the views you will find the default view with title "All Pages".

  10. Once you open the screen you will only see view on that screen with tag.
    <WebPartPages:XsltListViewWebPart></WebPartPages:XsltListViewWebPart>

  11. Split the screen and select the webpart from UI. Will automatically select the whole list view.

  12. On the top ribbon bar select "Design" and under the sub options, on right hand side click "Customize Entire View"

  13. Once you click it. A big bunch of XSLT is added to the html.
    <xsl><xsl:stylesheet></xsl:stylesheet></xsl>

  14. Select and remove the whole block of
    <xsl><xsl:stylesheet></xsl:stylesheet></xsl>

  15. Paste the below given path over there.
    <XslLink>/Style%20Library/Sample.xsl</XslLink>