Showing posts with label Web Part. Show all posts

Thursday, May 29, 2014

Filter OOTB SharePoint ListView web part using IWebPartRow connection Interface and WebControl.

Related Blog

In one of my old blogs I tried to explain the similar thing(Filter OOTB SharePoint ListView web part using IWebPartRow connection Interface.). The purpose of that blog was just show a simple way of using the IWebPartRow connection and a ListView WebPart.

Goal

In the current blog we will try and filter ListView WebPart using Connection object in IWebPartRow. Also there will be a RadioButtonList using which we can drill down the filter.

Create a custom list

  1. Site Actions > View All Site Content
  2. Create new List
  3. Custom List
  4. Name the list "Sample".
  5. Visit list settings and add new column "Year".
  6. Add a few sample data.
  7. Alter the "All Items" and add ID in the view.
  8. Now the list will look like below given image.

Web part for Conncetion

  1. Open Visual Stuido 2010
  2. Create new project
  3. Select "Web Part". Don't mistake using "Visual Web Part".
  4. Rename the WebPart1 to "SampleConnection".
  5. Use the below given code to be used as a sample.
#region System

using System;
using System.ComponentModel;
using System.Web;
using System.Web.UI;
using System.Web.UI.WebControls;
using System.Web.UI.WebControls.WebParts;
using Microsoft.SharePoint;
using Microsoft.SharePoint.WebControls;
using System.Data;
using System.Collections.Generic;

#endregion

namespace SampleConnection.SampleConnection
{
    [ToolboxItemAttribute(false)]
    public class SampleConnection : WebPart, IWebPartRow
    {

        #region Properties

        /// <summary>
        /// Radiobutton
        /// </summary>
        private RadioButtonList RbtnYear { get; set; }

        /// <summary>
        /// Year
        /// </summary>
        private int XYear
        {
            get
            {
                if (System.Web.HttpContext.Current.Request.QueryString["XYear"] == null)
                {
                    return 0;
                }
                return Convert.ToInt32(System.Web.HttpContext.Current.Request.QueryString["XYear"]);
            }
        }

        /// <summary>
        /// The Data table view for the Schema
        /// </summary>
        private DataTable XTable { get; set; }

        #endregion

        #region Constructor

        /// <summary>
        /// Creates the Schema of the table to get filtered column
        /// </summary>
        public SampleConnection()
        {
            RbtnYear = new RadioButtonList();
            RbtnYear.Items.Insert(0, new ListItem("2004"));
            RbtnYear.Items.Insert(1, new ListItem("2007"));            
            RbtnYear.RepeatDirection = RepeatDirection.Horizontal;
            RbtnYear.AutoPostBack = true;
            RbtnYear.SelectedIndexChanged += new EventHandler(RbtnYear_SelectedIndexChanged);

            //Create the object
            XTable = new DataTable();

            //Adds the columns which we require for filteration
            DataColumn col = new DataColumn();
            col.DataType = typeof(int);
            col.ColumnName = "Year";
            XTable.Columns.Add(col);

            //Use the columns to be added to get the Values to be filtered
            DataRow row = XTable.NewRow();
            if (XYear == 0)
            {
                row["Year"] = Convert.ToInt32(RbtnYear.Items[0].Value);
            }
            else
            {
                row["Year"] = XYear;            // Year to be filtered                
            }
            XTable.Rows.Add(row);
        }

        #endregion

        #region Events

        /// <summary>
        /// Radio Button Events
        /// </summary>
        /// <param name="sender"></param>
        /// <param name="e"></param>
        void RbtnYear_SelectedIndexChanged(object sender, EventArgs e)
        {
            //URL of the Page
            string _url = System.Web.HttpContext.Current.Request.Url.AbsolutePath;
            _url = string.Format("{0}?XYear={1}", _url, RbtnYear.SelectedValue);

            if (System.Web.HttpContext.Current.Request.QueryString.Count > 0)
            {
                for (int i = 0; i < System.Web.HttpContext.Current.Request.QueryString.Count; i = i + 1)
                {
                    //The xyear
                    if (string.Compare(System.Web.HttpContext.Current.Request.QueryString.GetKey(i), "XYear", true) == 0)
                    {
                        continue;
                    }

                    //Recreate the URL
                    _url = string.Format("{0}&{1}={2}", _url, System.Web.HttpContext.Current.Request.QueryString.GetKey(i), System.Web.HttpContext.Current.Request.QueryString[i]);
                }
            }

            //Send user back to page
            System.Web.HttpContext.Current.Response.Redirect(_url);
        }

        #endregion

        #region Methods

        /// <summary>
        /// Override child controls
        /// </summary>
        protected override void CreateChildControls()
        {
            base.CreateChildControls();

            //Add the radio button control
            this.Controls.Add(RbtnYear);
            RbtnYear.SelectedIndex = 0;
            if (XYear > 0)
            {
                if (RbtnYear.Items.FindByValue(XYear.ToString()) != null)
                {
                    RbtnYear.SelectedValue = XYear.ToString();
                }
            }
        }

        /// <summary>
        /// Connection provider and that assigns the Schema
        /// </summary>
        /// <returns></returns>
        [ConnectionProvider("Row")]
        public IWebPartRow GetConnectionInterface()
        {
            return new SampleConnection();
        }


        #endregion

        #region Implemented property & methods of IWebPartRow

        /// <summary>
        /// Gets data row view for ListView
        /// </summary>
        /// <param name="callback"></param>
        public void GetRowData(RowCallback callback)
        {
            callback(XTable.DefaultView[0]);
        }

        /// <summary>
        /// Schema for the ListView web part
        /// </summary>
        public PropertyDescriptorCollection Schema
        {
            get
            {
                return TypeDescriptor.GetProperties(XTable.DefaultView[0]);
            }
        }

        #endregion
    }
}

How to use?

  1. SharePoint Site > Edit a page.
  2. Click "Add a Web Part".
  3. Top ribbon > List and Libraries > Select "Sample".
  4. Again Click "Add a Web Part".
  5. Top ribbon > Custom > Select "SampleConnection" web part.
  6. The screen will have now 2 Web Parts. Check out the below given image.
  7. This happens in Edit Mode of page only, so make sure the page is in Edit Mode. Have a look at the image below to select a connection web part.
  8. A box will popup to to select a filter. I will select Year. Click "Finish".
  9. Now to test this stuff. Select the year from the Year from the "Sample Connection" web part.

  10. So this was if a ListView needs filter. If we want to remove it. Just go through step 7 and click "Remove Connection" from the popup box. And the screen will be back to as it was.
Please let me know if this was helpful?

Thursday, September 20, 2012

Override Content Query Webpart to do on the run filteration.

Problem

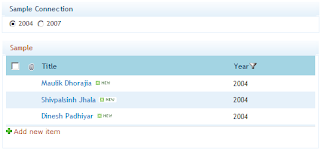
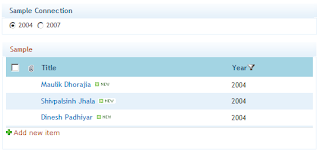
In one of my recent project I had a challenge of filtering the data with localization.
The project contained 2 languages, English and Spanish. I was trying to find out the out of the box way to get this done, but no help was available.


Solution

  1. Create a new empty project in Visual Studio 2010.
  2. Add a webpart to the project. "Webpart" not "Visual Web Part".
  3. Replace the Webpart class inherited and make it "Microsoft.SharePoint.Publishing.WebControls.ContentByQueryWebPart".
  4. Please have a look at the code below. It will have on the fly list settings and field settings applied to the webpart.
  5. Build your code and deploy it. It should work.


Source Code


#region System
using System;
using System.ComponentModel;
using System.Web;
using System.Web.UI;
using System.Web.UI.WebControls;
using System.Web.UI.WebControls.WebParts;
using Microsoft.SharePoint;
using Microsoft.SharePoint.WebControls;
#endregion

// Create the Toolbar
namespace ToolBar.ToolBar
{
    [ToolboxItemAttribute(false)]
    public class ToolBar : Microsoft.SharePoint.Publishing.WebControls.ContentByQueryWebPart
    {
        #region Properties

        /// <summary>
        /// Root Site Name
        /// </summary>
        private string SiteUrl { get { return SPContext.Current.Site.RootWeb.Url; } }

        /// <summary>
        /// List Name
        /// </summary>
        private string ListName { get { return "ToolBar"; } }

        /// <summary>
        /// List of Url
        /// </summary>
        private string ListUrl
        {
            get
            {
                return string.Format("{0}/Lists/{1}/AllItems.aspx", SiteUrl, ListName);
            }
        }

        #endregion

        #region Methods

        /// <summary>
        /// On Page Load
        /// </summary>
        /// <param name="e"></param>
        protected override void OnInit(EventArgs e)
        {
            //On Load
            base.OnLoad(e);

            //General Settings
            this.AllowConnect = true;
            this.ShowUntargetedItems = false;
            this.AllowEdit = true;
            
            //this.FrameType = "NONE"; // TODO
            this.ChromeType = PartChromeType.None;
            this.ExportMode = WebPartExportMode.All;
            this.GroupByDirection = SortDirection.Desc;
            this.SortByDirection = SortDirection.Desc;
            
            this.ConnectionID = System.Guid.Empty;
            this.ListId = System.Guid.Empty;

            this.ViewFlag = "0";
            this.GroupingText = "GP Web Parts";
            this.Title = " Tool Bar";
            this.ContentTypeName = "Item";
            this.ItemStyle = "ToolBar";
            this.ServerTemplate = "100";
            this.GroupStyle = "DefaultHeader";
            this.WebUrl = "~sitecollection";
            this.Description = "Displays a dynamic view of content from your site.";
            this.Xsl = "<xsl:stylesheet xmlns:x=\"http://www.w3.org/2001/XMLSchema\" version=\"1.0\" xmlns:xsl=\"http://www.w3.org/1999/XSL/Transform\" xmlns:cmswrt=\"http://schemas.microsoft.com/WebPart/v3/Publishing/runtime\" exclude-result-prefixes=\"xsl cmswrt x\" > <xsl:import href=\"/Style Library/XSL Style Sheets/Header.xsl\" /> <xsl:import href=\"/Style Library/XSL Style Sheets/ItemStyle.xsl\" /> <xsl:import href=\"/Style Library/XSL Style Sheets/ContentQueryMain.xsl\" /> </xsl:stylesheet>";
            this.SampleData = "<dsQueryResponse><Rows><Row Title=\"Item 1\" LinkUrl=\"http://Item1\" Group=\"Group Header\" __begincolumn=\"True\" __begingroup=\"True\" /><Row Title=\"Item 2\" LinkUrl=\"http://Item2\" __begincolumn=\"False\" __begingroup=\"False\" /><Row Title=\"Item 3\" LinkUrl=\"http://Item3\" __begincolumn=\"False\" __begingroup=\"False\" /></Rows></dsQueryResponse>";
            this.ParameterBindings = string.Empty;

            //Root Web
            using (SPWeb _web = SPContext.Current.Site.RootWeb)
            {
                //Assign the list to the CQWP
                SPList _listYCLToolBar = _web.GetListFromUrl(ListUrl);

                //Data mapping
                this.DataMappings = string.Format("Description:|LinkUrl:{2},TargetUrl,URL;|Title:{4},Title,Text;|NumComments:|PublishedDate:|PostCategory:|ImageUrlAltText:{0},Title,Text;|Author:|Language:{3},Language,Lookup;|ImageUrl:{1},Icon,URL;|Body:|"
                    , _listYCLToolBar.Fields["Title"].Id.ToString()
                    , "{" + _listYCLToolBar.Fields["Icon"].Id.ToString() + "}"
                    , "{" + _listYCLToolBar.Fields["TargetUrl"].Id.ToString() + "}"
                    , "{" + _listYCLToolBar.Fields["Language"].Id.ToString() + "}"
                    , "{" + _listYCLToolBar.Fields["Title"].Id.ToString() + "}"
                    );

                this.ListGuid = _listYCLToolBar.ID.ToString();

                this.DataMappingViewFields = string.Format("{0},URL;{1},URL;{2},Text;{3},Lookup;"
                    , "{" + _listYCLToolBar.Fields["TargetUrl"].Id.ToString() + "}"
                    , "{" + _listYCLToolBar.Fields["Icon"].Id.ToString() + "}"
                    , "{" + _listYCLToolBar.Fields["Title"].Id.ToString() + "}"
                    , "{" + _listYCLToolBar.Fields["Language"].Id.ToString() + "}"
                    );
                
                //Filter One
                this.FilterField1 = "Language";//Custom Field to get the variation work.
                this.FilterOperator1 = FilterFieldQueryOperator.Eq;
                this.FilterValue1 = System.Globalization.CultureInfo.CurrentCulture.IetfLanguageTag;
                this.FilterType1 = "Lookup";
                this.Filter1ChainingOperator = FilterChainingOperator.Or;

                this.Filter2ChainingOperator = FilterChainingOperator.Or;

                //Sorting
                this.SortByFieldType = "DateTime";
                this.SortBy = "Created";
            }            
        }

        /// <summary>
        /// Create Child Controls
        /// </summary>
        protected override void CreateChildControls()
        {
            base.CreateChildControls();
        }

        #endregion
    }
}


Please let me know if there is any issue with this code or you can also correct me if I am wrong.

Friday, January 13, 2012

SharePoint 2010 - Custom Toolpart properties for CQWP.

Goal

Adding custom fields in the tool pane of Content Query Web Part and using them. A few days ago I was working on a project with a similar requirement. I figured out that we can extend ToolPane and add custom controls to it.

How to achieve?

  1. Create a blank SharePoint project in Microsoft Visual Studio 2010 with name "CustomContentQueryWebPart".
  2. Add a "Web Part" to the project with name "ExtendedCQWP" and not to be mistaken with "Visual Web Part".

  3. Added a class "ExtendedCQWPToolPart" for the ToolPane in a folder name "CustomToolPart". Once the classes are added the structure of the project will look like the picture given below.

  4. Use the code for "ExtendedCQWPToolPart".
    #region System
    
    using System;
    using System.Collections.Generic;
    using System.Linq;
    using System.Text;
    using System.Web.UI.WebControls;
    
    #endregion
    
    namespace CustomContentQueryWebPart.CustomToolPart
    {
        /// <summary>
        /// The extended tool part of Extended Content Query Web Part.
        /// Will have a DropdownList, RadioButtonList and TextBox
        /// Will use the values added in the controls as applied.
        /// </summary>
        public class ExtendedCQWPToolPart : Microsoft.SharePoint.WebPartPages.ToolPart
        {
            #region Properties
    
            /// <summary>
            /// Literal
            /// </summary>
            protected Literal Ltrl { get; set; }
    
            /// <summary>
            /// Text Box
            /// </summary>
            protected TextBox Txt { get; set; }
    
            /// <summary>
            /// Dropdownlist
            /// </summary>
            protected DropDownList Ddl { get; set; }
    
            /// <summary>
            /// Radiobutton
            /// </summary>
            protected RadioButtonList Rbtnl { get; set; }
    
            #endregion
    
            #region Methods
    
            /// <summary>
            /// Constructor
            /// Applies the settings
            /// </summary>
            public ExtendedCQWPToolPart(string _ddlValue, string _rbtnValue, string _txtValue)
            {
                //Bind the ddl
                Ddl = new DropDownList();
                Ddl.Items.Insert(0, new ListItem("--- Select ---", ""));
                Ddl.Items.Insert(1, new ListItem("DDL 1"));
                Ddl.Items.Insert(2, new ListItem("DDL 2"));
                Ddl.Items.Insert(3, new ListItem("DDL 3"));
               
                //Radio Button the ddl
                Rbtnl = new RadioButtonList();
                Rbtnl.Items.Insert(0, new ListItem("RBTN 1"));
                Rbtnl.Items.Insert(1, new ListItem("RBTN 2"));
                Rbtnl.Items.Insert(2, new ListItem("RBTN 3"));
                Rbtnl.SelectedIndex = 0;
                
                //Text box
                Txt = new TextBox();
    
                //Refill the settings
                if (!string.IsNullOrEmpty(_ddlValue))
                {
                    Ddl.SelectedValue = _ddlValue;
                }
                if (!string.IsNullOrEmpty(_rbtnValue))
                {
                    Rbtnl.SelectedValue = _rbtnValue;
                }
                if (!string.IsNullOrEmpty(_txtValue))
                {
                    Txt.Text = _txtValue;
                }            
            }
    
            /// <summary>
            /// Applies the child controls
            /// </summary>
            protected override void CreateChildControls()
            {
                base.CreateChildControls();
    
                #region Add the controls to the section
    
                //Title to the web part
                this.Title = "Extended Settings";
    
                //Add the contorls so that they show up on the screen
                Ltrl = new Literal();
                Ltrl.Text = "<b>Dropdown Selection</b><br /><br />";
                this.Controls.Add(Ltrl);
                this.Controls.Add(Ddl);
    
                Ltrl = new Literal();
                Ltrl.Text = "<br /><br /><b>Radiobutton Selection</b><br /><br />";
                this.Controls.Add(Ltrl);
                this.Controls.Add(Rbtnl);
    
                Ltrl = new Literal();
                Ltrl.Text = "<br /><br /><b>Textbox</b><br /><br />";
                this.Controls.Add(Ltrl);
                this.Controls.Add(Txt);
    
                Ltrl = new Literal();
                Ltrl.Text = "<br /><br />";
                this.Controls.Add(Ltrl);
    
                #endregion
            }
    
            /// <summary>
            /// Fires on the OK/Save is clicked in the tool part pane
            /// </summary>
            public override void ApplyChanges()
            {
                base.ApplyChanges();
    
                //Applies the custom settings to the content query web part
                ExtendedCQWP.ExtendedCQWP _parentWebPart = (ExtendedCQWP.ExtendedCQWP)this.ParentToolPane.SelectedWebPart;
                if (_parentWebPart != null)
                {
                    //Applies the control settings
                    _parentWebPart.DdlValue = Ddl.SelectedValue;
                    _parentWebPart.RbtnlValue = Rbtnl.SelectedValue;
                    _parentWebPart.TxtValue = Txt.Text;
    
                    //Applies the settings
                    _parentWebPart.ApplyChanges();
                }
                
            }
    
            #endregion
            
        }
    }
    
  5. For "ExtendedCQWP" add a reference of Microsoft.Sharepoint.Publishing and the code is given below.

    #region System
    
    using System;
    using System.ComponentModel;
    using System.Web;
    using System.Web.UI;
    using System.Web.UI.WebControls;
    using System.Web.UI.WebControls.WebParts;
    using Microsoft.SharePoint;
    using Microsoft.SharePoint.WebControls;
    using System.Collections.Generic;
    using Microsoft.SharePoint.WebPartPages;
    
    #endregion
    
    namespace CustomContentQueryWebPart.ExtendedCQWP
    {
        /// <summary>
        /// Sample extended Content Query Web Part
        /// </summary>
        [ToolboxItemAttribute(false)]
        public class ExtendedCQWP : Microsoft.SharePoint.Publishing.WebControls.ContentByQueryWebPart
        {
            #region Properties
    
            /// <summary>
            /// Txt Value
            /// </summary>
            public string TxtValue { get; set; }
    
            /// <summary>
            /// Radio button Value
            /// </summary>
            public string RbtnlValue { get; set; }
    
            /// <summary>
            /// Txt Value
            /// </summary>
            public string DdlValue { get; set; }
    
            #endregion
    
            #region Methods
    
            /// <summary>
            /// Create Child Controls
            /// </summary>
            protected override void CreateChildControls()
            {
                base.CreateChildControls();
            }
    
            /// <summary>
            /// Override the get tool part
            /// </summary>
            /// <returns></returns>
            public override ToolPart[] GetToolParts()
            {
                List<ToolPart> _toolParts = new List<ToolPart>(base.GetToolParts());
                _toolParts.Insert(0, new CustomToolPart.ExtendedCQWPToolPart(DdlValue, RbtnlValue, TxtValue));
                return _toolParts.ToArray();
            }
    
            /// <summary>
            /// Applies the changes
            /// </summary>
            public void ApplyChanges()
            {
                this.Title = string.Format("DDL : {0}, Rbtn : {1}, Txt : {2}", DdlValue, RbtnlValue, TxtValue);
            }
    
            #endregion
        }
    }
    
  6. I renamed the title in element.xml so the web part show with title "Custom Content Query Web Part".
  7. Edit the newly added webpart.

    /li>
  8. The right side of the tool pane will show like the below given picture. Make the modification as you want.


  9. On applying or saving the settings my code will set the title concatenating all the 3 values.


This was the simplest way of showing how to add the custom parameters in the tool pane. We can do many more things with it not just setting the title. You can also go through one of my old blog Override Content Query Webpart to do on the run filteration to get an idea of what else can be done with extending the classes.
Hope the blog helped you, please comment if you have any queries. I will be very much happy to answer them.

Tuesday, August 30, 2011

Sharepoint 2010 deploy .webpart file Custom Group instead of Miscellaneous.

Goal
To deploy a web part using Module in Visual Studio project. The webpart should be deployed in group custom name "MBD Web Parts" and not in "Miscellaneous".

  • Open Visual Studio 2010.

  • File > New > Sharepoint > Empty Sharepoint Project > Name it "Sample"

  • Right click project > Add a Module > Name "Something".

  • Remove Sample.txt. Add a file(DemoWebPart.webpart) to the module.

  • Make the below given changes to the "Element.xml".

  • Right click project and deploy.

  • Visit your website.

  • Site Actions > Edit Site

  • Click "Add a Web Part". On the top ribbon.


You should now be able to see webpart in "MBD Web Parts" and not in "Miscellaneous".

Change in Element.xml


<?xml version="1.0" encoding="utf-8"?>
<Elements xmlns="http://schemas.microsoft.com/sharepoint/">
<Module List="113" Name="Something" Url="_catalogs/wp">
<File Path="Something\DemoWebPart.webpart" Url="DemoWebPart.webpart" Type="GhostableInLibrary">
<Property Name="Group" Value="MBD Web Parts" />
</File>
</Module>
</Elements>


Hope this is helpfull for you!