Showing posts with label Visual Studio 2010. Show all posts

Thursday, May 29, 2014

Filter OOTB SharePoint ListView web part using IWebPartRow connection Interface and WebControl.

Related Blog

In one of my old blogs I tried to explain the similar thing(Filter OOTB SharePoint ListView web part using IWebPartRow connection Interface.). The purpose of that blog was just show a simple way of using the IWebPartRow connection and a ListView WebPart.

Goal

In the current blog we will try and filter ListView WebPart using Connection object in IWebPartRow. Also there will be a RadioButtonList using which we can drill down the filter.

Create a custom list

  1. Site Actions > View All Site Content
  2. Create new List
  3. Custom List
  4. Name the list "Sample".
  5. Visit list settings and add new column "Year".
  6. Add a few sample data.
  7. Alter the "All Items" and add ID in the view.
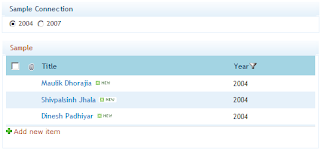
  8. Now the list will look like below given image.

Web part for Conncetion

  1. Open Visual Stuido 2010
  2. Create new project
  3. Select "Web Part". Don't mistake using "Visual Web Part".
  4. Rename the WebPart1 to "SampleConnection".
  5. Use the below given code to be used as a sample.
#region System

using System;
using System.ComponentModel;
using System.Web;
using System.Web.UI;
using System.Web.UI.WebControls;
using System.Web.UI.WebControls.WebParts;
using Microsoft.SharePoint;
using Microsoft.SharePoint.WebControls;
using System.Data;
using System.Collections.Generic;

#endregion

namespace SampleConnection.SampleConnection
{
    [ToolboxItemAttribute(false)]
    public class SampleConnection : WebPart, IWebPartRow
    {

        #region Properties

        /// <summary>
        /// Radiobutton
        /// </summary>
        private RadioButtonList RbtnYear { get; set; }

        /// <summary>
        /// Year
        /// </summary>
        private int XYear
        {
            get
            {
                if (System.Web.HttpContext.Current.Request.QueryString["XYear"] == null)
                {
                    return 0;
                }
                return Convert.ToInt32(System.Web.HttpContext.Current.Request.QueryString["XYear"]);
            }
        }

        /// <summary>
        /// The Data table view for the Schema
        /// </summary>
        private DataTable XTable { get; set; }

        #endregion

        #region Constructor

        /// <summary>
        /// Creates the Schema of the table to get filtered column
        /// </summary>
        public SampleConnection()
        {
            RbtnYear = new RadioButtonList();
            RbtnYear.Items.Insert(0, new ListItem("2004"));
            RbtnYear.Items.Insert(1, new ListItem("2007"));            
            RbtnYear.RepeatDirection = RepeatDirection.Horizontal;
            RbtnYear.AutoPostBack = true;
            RbtnYear.SelectedIndexChanged += new EventHandler(RbtnYear_SelectedIndexChanged);

            //Create the object
            XTable = new DataTable();

            //Adds the columns which we require for filteration
            DataColumn col = new DataColumn();
            col.DataType = typeof(int);
            col.ColumnName = "Year";
            XTable.Columns.Add(col);

            //Use the columns to be added to get the Values to be filtered
            DataRow row = XTable.NewRow();
            if (XYear == 0)
            {
                row["Year"] = Convert.ToInt32(RbtnYear.Items[0].Value);
            }
            else
            {
                row["Year"] = XYear;            // Year to be filtered                
            }
            XTable.Rows.Add(row);
        }

        #endregion

        #region Events

        /// <summary>
        /// Radio Button Events
        /// </summary>
        /// <param name="sender"></param>
        /// <param name="e"></param>
        void RbtnYear_SelectedIndexChanged(object sender, EventArgs e)
        {
            //URL of the Page
            string _url = System.Web.HttpContext.Current.Request.Url.AbsolutePath;
            _url = string.Format("{0}?XYear={1}", _url, RbtnYear.SelectedValue);

            if (System.Web.HttpContext.Current.Request.QueryString.Count > 0)
            {
                for (int i = 0; i < System.Web.HttpContext.Current.Request.QueryString.Count; i = i + 1)
                {
                    //The xyear
                    if (string.Compare(System.Web.HttpContext.Current.Request.QueryString.GetKey(i), "XYear", true) == 0)
                    {
                        continue;
                    }

                    //Recreate the URL
                    _url = string.Format("{0}&{1}={2}", _url, System.Web.HttpContext.Current.Request.QueryString.GetKey(i), System.Web.HttpContext.Current.Request.QueryString[i]);
                }
            }

            //Send user back to page
            System.Web.HttpContext.Current.Response.Redirect(_url);
        }

        #endregion

        #region Methods

        /// <summary>
        /// Override child controls
        /// </summary>
        protected override void CreateChildControls()
        {
            base.CreateChildControls();

            //Add the radio button control
            this.Controls.Add(RbtnYear);
            RbtnYear.SelectedIndex = 0;
            if (XYear > 0)
            {
                if (RbtnYear.Items.FindByValue(XYear.ToString()) != null)
                {
                    RbtnYear.SelectedValue = XYear.ToString();
                }
            }
        }

        /// <summary>
        /// Connection provider and that assigns the Schema
        /// </summary>
        /// <returns></returns>
        [ConnectionProvider("Row")]
        public IWebPartRow GetConnectionInterface()
        {
            return new SampleConnection();
        }


        #endregion

        #region Implemented property & methods of IWebPartRow

        /// <summary>
        /// Gets data row view for ListView
        /// </summary>
        /// <param name="callback"></param>
        public void GetRowData(RowCallback callback)
        {
            callback(XTable.DefaultView[0]);
        }

        /// <summary>
        /// Schema for the ListView web part
        /// </summary>
        public PropertyDescriptorCollection Schema
        {
            get
            {
                return TypeDescriptor.GetProperties(XTable.DefaultView[0]);
            }
        }

        #endregion
    }
}

How to use?

  1. SharePoint Site > Edit a page.
  2. Click "Add a Web Part".
  3. Top ribbon > List and Libraries > Select "Sample".
  4. Again Click "Add a Web Part".
  5. Top ribbon > Custom > Select "SampleConnection" web part.
  6. The screen will have now 2 Web Parts. Check out the below given image.
  7. This happens in Edit Mode of page only, so make sure the page is in Edit Mode. Have a look at the image below to select a connection web part.
  8. A box will popup to to select a filter. I will select Year. Click "Finish".
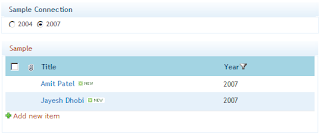
  9. Now to test this stuff. Select the year from the Year from the "Sample Connection" web part.

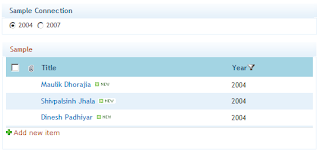
  10. So this was if a ListView needs filter. If we want to remove it. Just go through step 7 and click "Remove Connection" from the popup box. And the screen will be back to as it was.
Please let me know if this was helpful?

Thursday, September 20, 2012

Sharepoint 2010 Error Solution : The Visible property cannot be set on Web Part 'g_XXX'. It can only be set on a standalone Web Part.

Problem

There is an issue with OOTB SharePoint logic.

Scenario

  1. 2 types of Users
    • User1 is Site Administrator
    • User2 is a simple user with Read, Limited Access.
  2. Issue comes under blog site.


How to reproduce? Follow the below given test case.

  1. Create a site collection. In my case I have created it on "http://pc92".
  2. I create a blog site with name "TestBlog" using User1. In my case it is "http://pc92/TestBlog/".
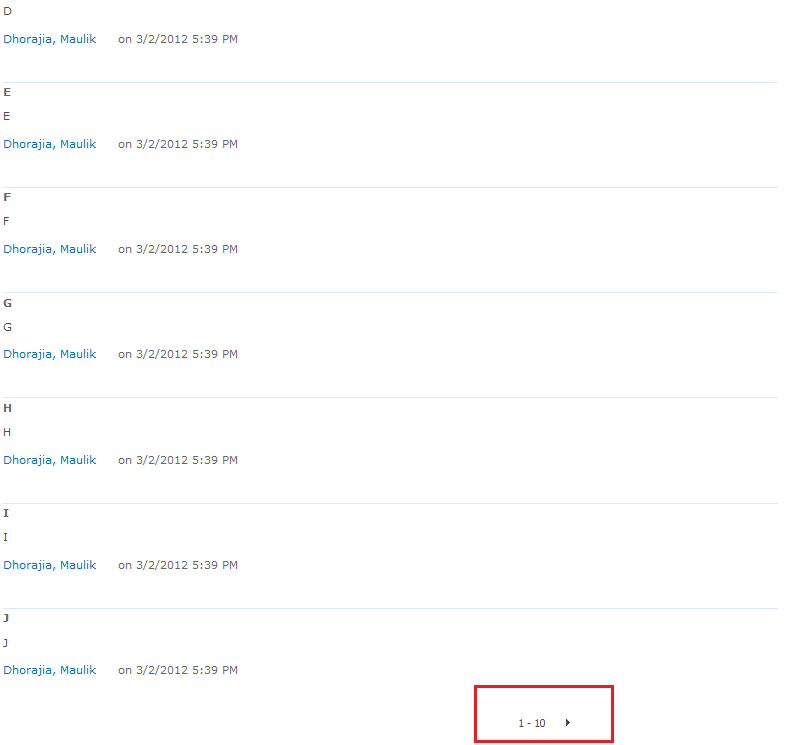
  3. Navigate to default blog created on site and add 11 comments. Right now the URL will be "http://pc92/TestBlog/Lists/Posts/Post.aspx?ID=1". This will enable the paging at the comments webpart.
  4. Now login with User2(Read, Limited Access User) and navigate to the URL "http://pc92/TestBlog/Lists/Posts/Post.aspx?ID=1". The page will show normal. The only difference here is you won't see the "Add Comment" box at the bottom of the screen.
  5. Click the next button. You will see the error.


Cause

The cause of the whole act is when you login as a User2(Read, Limited Access) the Comment Box(ListFormWebPart) is not available for this users. On page load everything is fine. But when you do a postback like paging event it bombs out. This might have got out of the site of MicroSoft Team.

Solution

I created 2 features, one is a site based feature(BlogFixSite) and another one web based feature(BlogFixWeb). On the BlogFixSite activation we check all the web which doesnot have BlogFixWeb activated and the template is a Blog template. So if the feature is activated I assume that the site is already having a fix. In the BlogFixWeb I go to the "Posts" folder and copy "Post.aspx" content and create "Post1.aspx". In the "Post1.aspx" i will remove the "ListFormWebPart" programatically. In "Post.aspx" at the bottom i will place a jquery which will check if the "Add Comment" box is missing than take the user to "Post1.aspx". Repeat the above given test cases and you should be all good.

BlogFixSite - C#

#region System
using System;
using System.Runtime.InteropServices;
using System.Security.Permissions;
using Microsoft.SharePoint;
using Microsoft.SharePoint.Security;
using Microsoft.SharePoint.Administration;
using System.Collections.Generic;
using System.Linq;
#endregion

namespace BlogFix.Features.BlogFixSite
{
    [Guid("63c859cc-77ff-436e-a79e-b4619a67c7c3")]
    public class BlogFixSiteEventReceiver : SPFeatureReceiver
    {
        #region Events

        /// <summary>
        /// Activating
        /// </summary>
        /// <param name="properties"></param>
        public override void FeatureActivated(SPFeatureReceiverProperties properties)
        {
            base.FeatureActivated(properties);

            try
            {
                //Site object
                SPSite _site = (SPSite)properties.Feature.Parent;

                if (_site != null)
                {
                    //Feature ID - BlogFixWeb
                    Guid _featureWeGuid = new Guid("c7178a85-ed45-4f27-bd4a-db2ec3eed95b");

                    //Web List
                    IList<SPWeb> _webList = (from _web in _site.AllWebs.Cast<SPWeb>()
                                             where string.Compare(_web.WebTemplate, "Blog", true) == 0
                                                 && _web.Features[_featureWeGuid] == null
                                             select _web).ToList();

                    //Change the post page
                    foreach (SPWeb _web in _webList)
                    {
                        //Enables the feature - BlogFixWeb
                        if (_web.Features[_featureWeGuid] == null)
                        {
                            _web.Features.Add(_featureWeGuid);
                        }
                    }
                }
            }
            catch (Exception Exc)
            {
                SPDiagnosticsService.Local.WriteTrace(0, new SPDiagnosticsCategory("BlogFixSiteEventReceiver - Activated", TraceSeverity.Unexpected, EventSeverity.Error), TraceSeverity.Unexpected, Exc.Message, Exc.StackTrace);
            }
        }

        #endregion
    }
}


BlogFixWeb - C#

#region System
using System;
using System.Runtime.InteropServices;
using System.Security.Permissions;
using Microsoft.SharePoint;
using Microsoft.SharePoint.Security;
using Microsoft.SharePoint.Administration;
using System.Collections.Generic;
using System.Linq;
#endregion

namespace BlogFix.Features.BlogFixWeb
{
    [Guid("564b0ad9-90a0-45fc-a672-901ec1fd111b")]
    public class BlogFixWebEventReceiver : SPFeatureReceiver
    {
        #region Events

        /// <summary>
        /// Activate the web based feautre
        /// </summary>
        /// <param name="properties"></param>
        public override void FeatureActivated(SPFeatureReceiverProperties properties)
        {
            base.FeatureActivated(properties);

            try
            {
                SPWeb _web = (SPWeb)properties.Feature.Parent;

                //All the subfolders
                SPFolderCollection _folderCollection = _web.Folders["Lists"].SubFolders;

                //Finds the folder containing Post.aspx
                IList<SPFolder> _folderPostList = (from _folderX in _folderCollection.Cast<SPFolder>()
                                                   let _fName = _folderX.Name
                                                   let _fCount = (from _fileX in _folderX.Files.Cast<SPFile>()
                                                                  where string.Compare(_fileX.Name, "post.aspx", true) == 0
                                                                  select _fileX).Count()
                                                   where _fCount > 0
                                                   select _folderX).ToList();


                //Loop it if there are more than one
                if (_folderPostList != null)
                {
                    foreach (SPFolder _folderPost in _folderPostList)
                    {
                        //Get the Post file
                        SPFile _filePost = (from _fileX in _folderPost.Files.Cast<SPFile>()
                                            where string.Compare(_fileX.Name, "post.aspx", true) == 0
                                            select _fileX).FirstOrDefault();

                        //The file post to be copied
                        if (_filePost != null)
                        {
                            //New Post1.aspx URL
                            string _newPostUrl = string.Format("{0}/{1}/{2}",
                                _web.Url,
                                _folderPost.Url,
                                "Post1.aspx");

                            //Copy the file
                            _filePost.CopyTo(_newPostUrl, true);
                            
                            //Update the folder
                            _folderPost.Update();

                            //Remove the control once the page is copied
                            Microsoft.SharePoint.WebPartPages.SPLimitedWebPartManager _webPartCollection = _web.GetLimitedWebPartManager(_newPostUrl, System.Web.UI.WebControls.WebParts.PersonalizationScope.Shared);

                            //Retrive the webpart and remove
                            Microsoft.SharePoint.WebPartPages.WebPart _listFormWebPart = (from _wp in _webPartCollection.WebParts.Cast<Microsoft.SharePoint.WebPartPages.WebPart>()
                                                                                          where _wp.GetType().UnderlyingSystemType.Name == "ListFormWebPart"
                                                                                          select _wp).FirstOrDefault();


                            //Microsoft.SharePoint.WebPartPages.ListFormWebPart _XlistFormWebPart = (Microsoft.SharePoint.WebPartPages.ListFormWebPart)_listFormWebPart;
                            //string _webPartTitle = _XlistFormWebPart.Title
                            //return;

                            if (_listFormWebPart != null)
                            {
                                //Remove the webpart
                                _webPartCollection.DeleteWebPart(_listFormWebPart);

                                //Update
                                _web.Update();
                            }

                            //Modify Post1.aspx and add the javascript tag
                            if (_filePost.RequiresCheckout)
                            {
                                _filePost.CheckOut();
                            }

                            //Edit the file
                            byte[] _htmlByte = _filePost.OpenBinary();
                            string _html = System.Text.Encoding.ASCII.GetString(_htmlByte);
                            string _topHtml = _html.Substring(0, _html.LastIndexOf("</asp:Content>"));
                            string _stript = "\n<script language=\"javascript\" type=\"text/javascript\">!window.jQuery && document.write('<script src=\"http://code.jquery.com/jquery-1.4.2.min.js\"><\\/script>');</script>\n<script language='javascript'>\n\r$(document).ready(function(){\n\r\rif($(\"h3[class='ms-CommentHeader']\").length == 1){\n\r\r\r\rwindow.location.href =     window.location.href.replace(\".aspx?\" , \"1.aspx?\");\n\r\r}\n\r});</script>";
                                

                            _html = string.Format("{0}{1}</asp:Content>", _topHtml, _stript);
                            _filePost.SaveBinary(System.Text.Encoding.ASCII.GetBytes(_html));

                            //Check In
                            if (_filePost.RequiresCheckout)
                            {
                                _filePost.CheckIn(string.Empty);
                            }
                        }
                    }
                }

            }
            catch (Exception Exc)
            {
                SPDiagnosticsService.Local.WriteTrace(0, new SPDiagnosticsCategory("BlogFixWebEventReceiver - Activated", TraceSeverity.Unexpected, EventSeverity.Error), TraceSeverity.Unexpected, Exc.Message, Exc.StackTrace);
            }
        }

        #endregion
    }
}


JavaScript added on Post.aspx

There are 2 "<h3></h3>" tags on the post.aspx page. (1) is "Comments" and (2) is "Add Comments". So if a user dont have access he/she wont see "Add Comment" box. If that box doesnot exists on the page I simply send the user to Post1.aspx.
<script>    !window.jQuery && document.write('<script src="http://code.jquery.com/jquery-1.4.2.min.js"><\/script>');</script>
<script language='javascript'>
    $(document).ready(function () {
        if ($("h3[class='ms-CommentHeader']").length == 1) {
            window.location.href = window.location.href.replace(".aspx?", "1.aspx?");
        }
    });</script>


Final Comments

To make this feature available for all the webs just create a feature stapler which activates the web based feature just like its done in "BlogFixSite".
I know many people wont agree with my solution but right now it is what it is. Happy Coding. Do let me know if this helped you.

Tuesday, June 19, 2012

WCF Services : Simplest way to create a WCF REST(Representational State Transfer) service.

Goal

To create a WCF REST(Representational State Transfer) service. The main goal is to show it in the most simplest way.

Follow the below given steps

  1. Open Visual Studio 2010.
  2. File >> New Project >> WCF >> WCF Service Application. I named it SimpleWCFService.
  3. I removed the default "IService1.cs" and "Service1.svc". Added a new "Sample.svc". This will automatically create an interface in file "ISample.cs". The structure will look like the image given below.

ISample.cs

#region System
using System;
using System.Collections.Generic;
using System.Linq;
using System.Runtime.Serialization;
using System.ServiceModel;
using System.Text;
using System.ServiceModel.Web;
#endregion

namespace SimpleWCFService
{
    [ServiceContract]
    public interface ISample
    {
        /// <summary>
        /// The parameters are passed in URL expression.
        /// </summary>
        /// <param name="Param1"></param>
        /// <param name="Param2"></param>
        /// <returns></returns>
        [OperationContract]
        [WebGet(UriTemplate = "SampleCheck/{Param1}/{Param2}")]
        string SampleCheckUrl(string Param1, string Param2);

        /// <summary>
        /// The parameters are passed as QueryString.
        /// </summary>
        /// <param name="Param1">{Param1}</param>
        /// <param name="Param2">{Param2}</param>
        /// <returns></returns>
        [OperationContract]
        [WebGet(UriTemplate = "SampleCheck?Param1={Param1}&Param2={Param2}")]
        string SampleCheckQueryString(string Param1, string Param2);
    }
}

Sample.svc.cs

#region System
using System;
using System.Collections.Generic;
using System.Linq;
using System.Runtime.Serialization;
using System.ServiceModel;
using System.Text;
using System.Web.Script.Serialization;
#endregion

namespace SimpleWCFService
{

    /// <summary>
    /// Simple Class
    /// </summary>
    [DataContract]
    public class SimpleClass
    {
        [DataMember]
        public string CParam1 { get; set; }

        [DataMember]
        public string CParam2 { get; set; }

        [DataMember]
        public string CMessage { get; set; }
    }


    /// <summary>
    /// The simplest way to use a WCF REST(Representational State Transfer) service
    /// </summary>
    public class Sample : ISample
    {

        /// <summary>
        /// The parameters are passed in URL expression.
        /// </summary>
        /// <param name="Param1"></param>
        /// <param name="Param2"></param>
        /// <returns></returns>
        public string SampleCheckUrl(string Param1, string Param2)
        {
            JavaScriptSerializer _jScript = new JavaScriptSerializer();
            SimpleClass _simple = new SimpleClass()
            {
                CParam1 = Param1,
                CParam2 = Param2,
                CMessage = "Success with SampleCheckUrl(int Param1, string Param2)!"
            };
            return _jScript.Serialize(_simple);            
        }

        /// <summary>
        /// The parameters are passed as QueryString.
        /// </summary>
        /// <param name="Param1"></param>
        /// <param name="Param2"></param>
        /// <returns></returns>
        public string SampleCheckQueryString(string Param1, string Param2)
        {
            JavaScriptSerializer _jScript = new JavaScriptSerializer();
            SimpleClass _simple = new SimpleClass()
            {
                CParam1 = Param1,
                CParam2 = Param2,
                CMessage = "Success with SampleCheckQueryString(int Param1, string Param2)!"
            };
            return _jScript.Serialize(_simple);
        }
    }
}

Web.config - MOST IMPORTANT

<?xml version="1.0"?>
<configuration> 
  <system.web>
    <compilation debug="true" targetFramework="4.0" />
  </system.web>
  <system.serviceModel>
    <behaviors>
      <serviceBehaviors>
        <behavior name="SimpleWCFServiceBC">
          <serviceMetadata httpGetEnabled="true"/>
          <serviceDebug includeExceptionDetailInFaults="false"/>
        </behavior>
      </serviceBehaviors>
      <endpointBehaviors>
        <behavior name="restBehaviour">
          <webHttp automaticFormatSelectionEnabled="true" helpEnabled="true"/>
        </behavior>
      </endpointBehaviors>
    </behaviors>
    <bindings>
      <webHttpBinding>
        <binding name="RestBinding" />
      </webHttpBinding>
      <basicHttpBinding>

      </basicHttpBinding>
    </bindings>
    <services>
      <service name="SimpleWCFService.Sample" behaviorConfiguration="SimpleWCFServiceBC">
        <endpoint address="" binding="basicHttpBinding" contract="SimpleWCFService.ISample"></endpoint>
        <endpoint address="rest" binding="webHttpBinding" behaviorConfiguration="restBehaviour" bindingConfiguration="RestBinding" contract="SimpleWCFService.ISample"></endpoint>
        <endpoint contract="IMetadataExchange" binding="mexHttpBinding" address="mex" />
      </service>
    </services>
  </system.serviceModel>

  <system.webServer>
    <modules runAllManagedModulesForAllRequests="true"/>
  </system.webServer>

</configuration>

Checking REST Service - URL FORMAT

Navigate to the below given url(Note:Replace the port number.).
"http://{LOCALHOST:PORTNUMBER}/Sample.svc/rest/SampleCheck/Args1/Args2".
This should give the result in below given format.
<string xmlns="http://schemas.microsoft.com/2003/10/Serialization/">{"CParam1":"Args1","CParam2":"Args2","CMessage":"Success with SampleCheckUrl(int Param1, string Param2)!"}</string> 

Checking REST Service - QueryString

Navigate to the below given url(Note:Replace the port number.).
"http://{LOCALHOST:PORTNUMBER/Sample.svc/rest/SampleCheck?Param1=Args1&Param2=Args2".
This should give the result in below given format.
<string xmlns="http://schemas.microsoft.com/2003/10/Serialization/">{"CParam1":"Args1","CParam2":"Args2","CMessage":"Success with SampleCheckQueryString(int Param1, string Param2)!"}</string> 


I spent a lot of time trying to figure this out so writing this up for the ones who just want solutions. Let me know if this helped.

Friday, May 18, 2012

Apply "Multiple" column Group By on DataTable in C#

Goal

A few days ago a reader asked for Multiple column group by on DataTable. This blos is in reply of that question. This was my old blog Apply group by clause on Datatable in C#.

Solution

#region System
using System;
using System.Collections.Generic;
using System.Linq;
using System.Text;
using System.Data;
#endregion

namespace SampleApplication
{
    #region Enums

    /// <summary>
    /// The functions which can be used for aggreation
    /// </summary>
    public enum AggregateFunction
    {
        Sum,
        Avg,
        Count,
        Max,
        Min
    }

    #endregion

    #region Entity

    /// <summary>
    /// The class which will have properties of function to be performed and on which field
    /// </summary>
    public class DataTableAggregateFunction
    {
        /// <summary>
        /// The function to be performed
        /// </summary>
        public AggregateFunction enmFunction { get; set; }

        /// <summary>
        /// Performed for which column
        /// </summary>
        public string ColumnName { get; set; }

        /// <summary>
        /// What should be the name after output
        /// </summary>
        public string OutPutColumnName { get; set; }
    }

    #endregion
    

    public class Helper
    {
        /// <summary>
        /// Demo for Group By
        /// </summary>
        public void DemoGroupBy()
        { 
            //Gets the mock data table
            DataTable _dt = GetDataTable();

            //Add columns which you want to group by
            IList<string> _groupByColumnNames = new List<string>();
            _groupByColumnNames.Add("State");
            _groupByColumnNames.Add("City");

            //Functions you want to perform on which fields
            IList<DataTableAggregateFunction> _fieldsForCalculation = new List<DataTableAggregateFunction>();
            _fieldsForCalculation.Add(new DataTableAggregateFunction() { enmFunction = AggregateFunction.Avg, ColumnName = "Population", OutPutColumnName = "PopulationAvg" });
            _fieldsForCalculation.Add(new DataTableAggregateFunction() { enmFunction = AggregateFunction.Sum, ColumnName = "Population", OutPutColumnName = "PopulationSum" });
            _fieldsForCalculation.Add(new DataTableAggregateFunction() { enmFunction = AggregateFunction.Count, ColumnName = "Population", OutPutColumnName = "PopulationCount" });
            _fieldsForCalculation.Add(new DataTableAggregateFunction() { enmFunction = AggregateFunction.Max, ColumnName = "Year", OutPutColumnName = "YearMax" });
            _fieldsForCalculation.Add(new DataTableAggregateFunction() { enmFunction = AggregateFunction.Min, ColumnName = "Year", OutPutColumnName = "YearMin" });

            //Gets the result after grouping by
            DataTable dtGroupedBy = GetGroupedBy(_dt, _groupByColumnNames, _fieldsForCalculation);
        }


        /// <summary>
        /// Returns a mock data table
        /// </summary>
        /// <returns></returns>
        private DataTable GetDataTable()
        {
            //Declarations
            DataTable _dt = new DataTable();
            DataRow _dr;
            
            //Create columns
            _dt.Columns.Add(new DataColumn() { ColumnName = "State" });
            _dt.Columns.Add(new DataColumn() { ColumnName = "City" });
            _dt.Columns.Add(new DataColumn() { ColumnName = "Year", DataType = typeof(System.Int32) });
            _dt.Columns.Add(new DataColumn() { ColumnName = "Population", DataType = typeof(System.Int32) });

            //Add mock data
            _dr = _dt.NewRow(); _dr["State"] = "Gujarat"; _dr["City"] = "Ahmedabad"; _dr["Year"] = 2009; _dr["Population"] = 6000000; _dt.Rows.Add(_dr);
            _dr = _dt.NewRow(); _dr["State"] = "Gujarat"; _dr["City"] = "Surat"; _dr["Year"] = 2009; _dr["Population"] = 2000000; _dt.Rows.Add(_dr);
            _dr = _dt.NewRow(); _dr["State"] = "Gujarat"; _dr["City"] = "Rajkot"; _dr["Year"] = 2009; _dr["Population"] = 1000000; _dt.Rows.Add(_dr);
            _dr = _dt.NewRow(); _dr["State"] = "Maharastra"; _dr["City"] = "Mumbai"; _dr["Year"] = 2009; _dr["Population"] = 3000000; _dt.Rows.Add(_dr);
            _dr = _dt.NewRow(); _dr["State"] = "Maharastra"; _dr["City"] = "Pune"; _dr["Year"] = 2009; _dr["Population"] = 3000000; _dt.Rows.Add(_dr);

            _dr = _dt.NewRow(); _dr["State"] = "Gujarat"; _dr["City"] = "Ahmedabad"; _dr["Year"] = 2010; _dr["Population"] = 8000000; _dt.Rows.Add(_dr);
            _dr = _dt.NewRow(); _dr["State"] = "Maharastra"; _dr["City"] = "Mumbai"; _dr["Year"] = 2010; _dr["Population"] = 8000000; _dt.Rows.Add(_dr);

            _dr = _dt.NewRow(); _dr["State"] = "Gujarat"; _dr["City"] = "Ahmedabad"; _dr["Year"] = 2011; _dr["Population"] = 6000000; _dt.Rows.Add(_dr);
            _dr = _dt.NewRow(); _dr["State"] = "Gujarat"; _dr["City"] = "Surat"; _dr["Year"] = 2011; _dr["Population"] = 2000000; _dt.Rows.Add(_dr);
            _dr = _dt.NewRow(); _dr["State"] = "Gujarat"; _dr["City"] = "Rajkot"; _dr["Year"] = 2011; _dr["Population"] = 1000000; _dt.Rows.Add(_dr);
            _dr = _dt.NewRow(); _dr["State"] = "Maharastra"; _dr["City"] = "Mumbai"; _dr["Year"] = 2011; _dr["Population"] = 3000000; _dt.Rows.Add(_dr);
            _dr = _dt.NewRow(); _dr["State"] = "Maharastra"; _dr["City"] = "Pune"; _dr["Year"] = 2011; _dr["Population"] = 3000000; _dt.Rows.Add(_dr);

            //Return table
            return _dt;
        }

        /// <summary>
        /// Group by DataTable
        /// </summary>
        /// <param name="_dtSource"></param>
        /// <param name="_groupByColumnNames"></param>
        /// <param name="_fieldsForCalculation"></param>
        /// <returns></returns>
        private DataTable GetGroupedBy(DataTable _dtSource, IList<string> _groupByColumnNames, IList<DataTableAggregateFunction> _fieldsForCalculation)
        {
            
            //Once the columns are added find the distinct rows and group it bu the numbet
            DataTable _dtReturn = _dtSource.DefaultView.ToTable(true, _groupByColumnNames.ToArray());

            //The column names in data table
            foreach (DataTableAggregateFunction _calculatedField in _fieldsForCalculation)
            {
                _dtReturn.Columns.Add(_calculatedField.OutPutColumnName);
            }

            //Gets the collection and send it back
            for (int i = 0; i < _dtReturn.Rows.Count; i = i + 1)
            {
                #region Gets the filter string
                string _filterString = string.Empty;
                for (int j = 0; j < _groupByColumnNames.Count; j = j + 1)
                {
                    if (j > 0)
                    {
                        _filterString += " AND ";
                    }
                    if (_dtReturn.Columns[_groupByColumnNames[j]].DataType == typeof(System.Int32))
                    {
                        _filterString += _groupByColumnNames[j] + " = " + _dtReturn.Rows[i][_groupByColumnNames[j]].ToString() + "";
                    }
                    else
                    {
                        _filterString += _groupByColumnNames[j] + " = '" + _dtReturn.Rows[i][_groupByColumnNames[j]].ToString() + "'";
                    }
                }
                #endregion

                #region Compute the aggregate command

                foreach (DataTableAggregateFunction _calculatedField in _fieldsForCalculation)
                {
                    _dtReturn.Rows[i][_calculatedField.OutPutColumnName] = _dtSource.Compute(_calculatedField.enmFunction.ToString() + "(" + _calculatedField.ColumnName + ")", _filterString);
                }
                
                #endregion
            }

            return _dtReturn;
        }
    }
}


How to Use?

Call the function from somewhere.
(new SampleApplication.Helper()).DemoGroupBy();


Screenshot

Before Group By :
After Group By :


Please let me know if this helped.

Thursday, May 17, 2012

SharePoint 2010 : Call server side function from XSL.

Goal

To use a server side function from a XSL used in a web part.

Solution

It is simple to use a server side function. Just need to make sure the dll should be deployed in GAC. In this example I created a class with name "ClassName", the project name is "SampleApplication". Deployed the dll in GAC. Modify the XSL head and add xmlns:helper="SampleApplication.ClassName" on the head. "helper" is like an tag which will point to the class.

XSL
<xsl:stylesheet 
  version="1.0" 
  exclude-result-prefixes="x d xsl msxsl cmswrt helper"
  xmlns:x="http://www.w3.org/2001/XMLSchema" 
  xmlns:d="http://schemas.microsoft.com/sharepoint/dsp" 
  xmlns:ddwrt="http://schemas.microsoft.com/WebParts/v2/DataView/runtime"
  xmlns:cmswrt="http://schemas.microsoft.com/WebParts/v3/Publishing/runtime"
  xmlns:xsl="http://www.w3.org/1999/XSL/Transform" xmlns:msxsl="urn:schemas-microsoft-com:xslt"
  xmlns:helper="SampleApplication.ClassName">


SampleApplication.ClassName
#region System
using System;
using System.Collections.Generic;
using System.Linq;
using System.Text;
#endregion

namespace SampleApplication
{
    public class ClassName
    {
        #region Properties
        
        /// <summary>
        /// Name 
        /// </summary>
        private static string Name = "Maulik Dhorajia";
        
        /// <summary>
        /// Today Date
        /// </summary>
        private static string TodayDate = System.DateTime.Now.ToString();

        #endregion

        /// <summary>
        /// Gets the property
        /// </summary>
        /// <param name="propertyKey"></param>
        /// <returns></returns>
        public static string GetProperty(string propertyKey)
        {
            if (propertyKey == "Name")
            {
                return Name;
            }
            else if (propertyKey == "TodayDate")
            {
                return TodayDate;
            }
            else 
            {
                return "";
            }
        }
    }
}


Calling the function from XSL
<xsl:value-of select="helper:GetLabel('Name')"/>
<xsl:value-of select="helper:GetLabel('TodayDate')"/>


This should be all to show the stuff on the page. Let me know if this helped.

Wednesday, May 16, 2012

SharePoint 2010 : Insert custom icon in a custom group on Ribbon of Document Library.

Goal

Insert a custom icon(Email icon) on the SharePoint Document Library. The Icon should show in a Custom Group.

Challange

I thought getting the Icon on the top was easy(actually it was easy to place an icon on the top). But to place the icon in a Custom Group was a bit tough that it seems.

Follow the steps to achieve

  1. Open Visual Studio 2010, Create an empty SharePoint Application.
  2. Add a Module, Edit the Element.xml
    <?xml version="1.0" encoding="utf-8"?>
    <Elements xmlns="http://schemas.microsoft.com/sharepoint/">
      <CustomAction
          Id="EmailDocsCustom"
          Location="CommandUI.Ribbon"
          RegistrationType="ContentType"
          RegistrationId="0x01">
        <CommandUIExtension>
          <CommandUIDefinitions>
            <CommandUIDefinition Location="Ribbon.Documents.Groups._children">
              <Group
                  Id="EmailDocsCustomGroup"
                  Sequence="100"
                  Description="E-Mail Controls"
                  Title="E-Mail Controls"
                  Template="EmailDocsCustomGroupTemplate">
                <Controls Id="EmailDocsCustomGroupControl">
                  <Button
                      Id="EmailDocsCustomGroupControlButton"
                      Sequence="5"
                      Command="SimpleAlert"
                      Image32by32="/_layouts/1033/images/formatmap32x32.png" Image32by32Left="-448" Image32by32Top="-128"
                      ToolTipTitle="Email Documents"
                      ToolTipDescription="Select the documents which you want to email!"
                      LabelText="Email Selected Documents"
                      TemplateAlias="o1" />
                </Controls>
              </Group>
            </CommandUIDefinition>
            <CommandUIDefinition Location="Ribbon.Templates._children">
              <GroupTemplate Id="EmailDocsCustomGroupTemplate">
                <Layout Title="LargeLarge">
                  <OverflowSection Type="OneRow" TemplateAlias="o1" DisplayMode="Large"/>
                  <OverflowSection Type="OneRow" TemplateAlias="o2" DisplayMode="Large"/>
                </Layout>
              </GroupTemplate>
            </CommandUIDefinition>
            <CommandUIDefinition Location="Ribbon.Documents.Scaling._children">
              <MaxSize Id="Ribbon.Documents.Scaling.Custom.MaxSize" Sequence="15" GroupId="EmailDocsCustomGroup" Size="LargeLarge" />
            </CommandUIDefinition>
          </CommandUIDefinitions>
          <CommandUIHandlers>
            <CommandUIHandler Command="SimpleAlert" CommandAction="javascript:OpenEmailPage();" />
          </CommandUIHandlers>
        </CommandUIExtension>
      </CustomAction>
    
      <CustomAction
       Id="EmailRelatedScript"
       Location="ScriptLink"
       ScriptSrc ="/_layouts/WhatEvePathYouHave/EmailScript.js"/>
      
    </Elements>
    
  3. Place the EmailScript.js at C:\Program Files\Common Files\Microsoft Shared\Web Server Extensions\14\TEMPLATE\LAYOUTS\WhatEvePathYouHave(You can map the folder and do this). With the help of this script you can do manipulations on the click of the icon placed on the top ribbon. Below is the script in EmailScript.js.
    //Get the current user and add the values found in the Email settings list
    function OpenEmailPage() {
    
        //Gets the current Context
        var _ctx = new SP.ClientContext.get_current();
        //Selected Items Variables
        var _itemIds = "";
        //Get current list id
        var _listId = SP.ListOperation.Selection.getSelectedList();
        var _listUrl = window.location.href;
        //get all selected list items
        var _selectedItems = SP.ListOperation.Selection.getSelectedItems(_ctx);
        //collect selected item ids
        for (var i = 0; i < _selectedItems.length; i++) {
            if (_itemIds == "")
            { _itemIds += _selectedItems[i].id; }
            else
            { _itemIds += "," + _selectedItems[i].id; }
        }
    
        alert('ListID = ' + _listId + "\nListUrl = " + _listUrl + "\nIDs=" + _itemIds);    
    }
  4. Before deploying the solution, check a document library. The ribbon on the top in the documents should like the below given image.
  5. Deploy the solution. Visit a Document Library, select docs and the new Icon should show up on the top right corner.
I am not very good with Ribbons and spent a lot of time to get just this portion. So thought if this can help many other who dont have time and have to get this quickly.

Friday, April 6, 2012

SharePoint 2010 : Use Resouce(resx) file in a Multilingual site.

Goal

Our site is created using variations in both English and Spanish. Create a Visual Web Part which can use the resource file(.resx) to show different texts for different language.

Steps to achieve goal

  • Create a SharePoint project with name "Sample".
  • Add a web part with name "SampleWebPart".
  • Add a "Mapped Folder" to "Resources". 2 files needs to be added.
    1. SampleWebPart.en-US.resx - English version resource file. Add some text to the resource.
    2. SampleWebPart.es-ES.resx - Spanish version resource file. Add some text to the resource.
  • At this point the project "Solution Explorer" will look like
  • For applying the resource, Open the Feature1 properties. And make the 2 changes shown in the below given image.
  • Use the HTML and C# Code below.
  • Once the above given steps are done, deploy the web part and They will display as below given image.


HTML - SampleWebPartUserControl.ascx

<h1><asp:Literal ID="ltrlTitle" runat="server" /></h1>
<hr />
<h3>
    <asp:Literal ID="ltrlDescription" runat="server" />
</h3>


C# - SampleWebPartUserControl.ascx.cs

#region System
using System;
using System.Web.UI;
using System.Web.UI.WebControls;
using System.Web.UI.WebControls.WebParts;
#endregion

namespace Sample.SampleWebPart
{
    /// <summary>
    /// Simple example to use Resouce file with English/Spanish language.
    /// </summary>
    public partial class SampleWebPartUserControl : UserControl
    {
        #region Events

        /// <summary>
        /// Page Load
        /// </summary>
        /// <param name="sender"></param>
        /// <param name="e"></param>
        protected void Page_Load(object sender, EventArgs e)
        {
            ltrlTitle.Text = LoadResource( ResourceName.Title );
            ltrlDescription.Text = LoadResource(ResourceName.Description);
        }

        #endregion

        #region Resource Reader

        /// <summary>
        /// Name for the Version to be considered.
        /// NOTE :- Use exactly same "Name" as used in Resource(resx) file.
        /// </summary>
        public enum ResourceName
        { 
            Title,
            Description
        }

        /// <summary>
        /// Gets the text on the basis of "Name" in Resource(resx).
        /// </summary>
        private string LoadResource(ResourceName _resName)
        {
            return Microsoft.SharePoint.Utilities.SPUtility.GetLocalizedString("$Resources:" + _resName.ToString(),
                "SampleWebPart"
            , (uint)System.Globalization.CultureInfo.CurrentUICulture.LCID); 
        }

        #endregion
    }
}


Happy Coding

Saturday, March 3, 2012

SharePoint 2010 Error Solution : A Web Part or Web Form Control on this Page cannot be displayed or imported. The type could not be found or it is not registered as safe.

Introduction

An occours when a user tries to add a webpart on the page. The description of the error is "A Web Part or Web Form Control on this Page cannot be displayed or imported. The type could not be found or it is not registered as safe.".


Test Cases

Here, I am creating a small solution to show why I got this issue.
  1. Open Visual Studio 2010. Create a project with name "Sample".
  2. Add a WebPart to the project with name "SomeWebPart"(Note : Mind it WebPart not VisualWebPart).
  3. Add a class library to the solution with name "Helper".
  4. Add a "Helper.snk" to the project by Right Clicking "Helper" > Properties > Signing > Choose a strong name...
  5. Once that is done the structure will look like image given below
  6. Helper.Enums Code
    using System;
    using System.Collections.Generic;
    using System.Linq;
    using System.Text;
    
    namespace Helper
    {
        public class Enums
        {
            public enum SomeType
            {
                A = 0,
                B = 1,
                C = 2
            }
        }
    }
    
  7. SomeWebPart.cs Code
    using System;
    using System.ComponentModel;
    using System.Web;
    using System.Web.UI;
    using System.Web.UI.WebControls;
    using System.Web.UI.WebControls.WebParts;
    using Microsoft.SharePoint;
    using Microsoft.SharePoint.WebControls;
    
    namespace Sample.SomeWebPart
    {
        [ToolboxItemAttribute(false)]
        public class SomeWebPart : WebPart
        {
            /// <summary>
            /// The enum which resides in enum
            /// </summary>
            public Helper.Enums.SomeType SomeTypeEnum { get; set; }
    
            /// <summary>
            /// Create child control
            /// </summary>
            protected override void CreateChildControls()
            {
    
            }       
            
        }
    }
  8. Deploy to the site. Try adding the WebPart and it will give the above mentioned error.


Problem

The problem is "Sample.dll" created for the WebPart gets added to the wsp and gets added to GAC automatically but the "Helper.dll" is not considered as a safe one and it stays out of GAC and so while adding the WebPart, it blows and the error shows on the alert window.

Solution

  1. Sample > Package > Open "Package.package"
  2. At the bottom you will find an option title "Advanced".
  3. As shown in the image select "Add Assembly from Project Output...".
  4. In the dialog select "Helper" will auto populate the Helper details.
  5. Safe Controls section add a new item.
  6. Fill the Namespace and Assembly with name "Helper".
  7. Click "OK" and exit the dialog. You can see the settings of Helper added on the Advanced screen.
  8. Deploy the WebPart and try adding it again. It should work.


Hope this helped!

SharePoint 2010 : Remove a WebPart from Page programmatically using C#.

Goal

To remove webparts from a page programmatically using C#.

Code

/// <summary>
/// This function will remove web parts with title passed
/// </summary>
/// <param name="_web">Web object</param>
/// <param name="_pageUrl">The url of the page on which the web part exists.</param>
/// <param name="_title">The title of the Web part</param>
private void RemoveWebPart(SPWeb _web, string _pageUrl, string _webPartTitle)
{
    //Remove the control once the page is copied
    Microsoft.SharePoint.WebPartPages.SPLimitedWebPartManager _webPartCollection = _web.GetLimitedWebPartManager(_pageUrl, System.Web.UI.WebControls.WebParts.PersonalizationScope.Shared);

    //Retrive the webpart and remove
    IList<Microsoft.SharePoint.WebPartPages.WebPart> _listFormWebParts = (from _wp in _webPartCollection.WebParts.Cast<Microsoft.SharePoint.WebPartPages.WebPart>()
                                                                            where string.Compare( _wp.Title , _webPartTitle  , true ) == 0
                                                                            select _wp).ToList();

    //Check if there are any web parts found
    if (_listFormWebParts != null)
    {
        foreach (Microsoft.SharePoint.WebPartPages.WebPart _listFormWebPart in _listFormWebParts)
        {
            //Remove the webpart
            _webPartCollection.DeleteWebPart(_listFormWebPart);

            //Update
            _web.Update();
        }
    }
}


Tip

Suppose we dont want to remove the webpart using "Title" we want to remove the webpart with type.
//Retrive the webpart and remove
IList<Microsoft.SharePoint.WebPartPages.WebPart> _listFormWebParts = (from _wp in _webPartCollection.WebParts.Cast<Microsoft.SharePoint.WebPartPages.WebPart>()
                                                                        where _wp.GetType() == typeof(Microsoft.SharePoint.WebPartPages.ListFormWebPart)
                                                                        select _wp).ToList();

Friday, January 13, 2012

SharePoint 2010 - Custom Toolpart properties for CQWP.

Goal

Adding custom fields in the tool pane of Content Query Web Part and using them. A few days ago I was working on a project with a similar requirement. I figured out that we can extend ToolPane and add custom controls to it.

How to achieve?

  1. Create a blank SharePoint project in Microsoft Visual Studio 2010 with name "CustomContentQueryWebPart".
  2. Add a "Web Part" to the project with name "ExtendedCQWP" and not to be mistaken with "Visual Web Part".

  3. Added a class "ExtendedCQWPToolPart" for the ToolPane in a folder name "CustomToolPart". Once the classes are added the structure of the project will look like the picture given below.

  4. Use the code for "ExtendedCQWPToolPart".
    #region System
    
    using System;
    using System.Collections.Generic;
    using System.Linq;
    using System.Text;
    using System.Web.UI.WebControls;
    
    #endregion
    
    namespace CustomContentQueryWebPart.CustomToolPart
    {
        /// <summary>
        /// The extended tool part of Extended Content Query Web Part.
        /// Will have a DropdownList, RadioButtonList and TextBox
        /// Will use the values added in the controls as applied.
        /// </summary>
        public class ExtendedCQWPToolPart : Microsoft.SharePoint.WebPartPages.ToolPart
        {
            #region Properties
    
            /// <summary>
            /// Literal
            /// </summary>
            protected Literal Ltrl { get; set; }
    
            /// <summary>
            /// Text Box
            /// </summary>
            protected TextBox Txt { get; set; }
    
            /// <summary>
            /// Dropdownlist
            /// </summary>
            protected DropDownList Ddl { get; set; }
    
            /// <summary>
            /// Radiobutton
            /// </summary>
            protected RadioButtonList Rbtnl { get; set; }
    
            #endregion
    
            #region Methods
    
            /// <summary>
            /// Constructor
            /// Applies the settings
            /// </summary>
            public ExtendedCQWPToolPart(string _ddlValue, string _rbtnValue, string _txtValue)
            {
                //Bind the ddl
                Ddl = new DropDownList();
                Ddl.Items.Insert(0, new ListItem("--- Select ---", ""));
                Ddl.Items.Insert(1, new ListItem("DDL 1"));
                Ddl.Items.Insert(2, new ListItem("DDL 2"));
                Ddl.Items.Insert(3, new ListItem("DDL 3"));
               
                //Radio Button the ddl
                Rbtnl = new RadioButtonList();
                Rbtnl.Items.Insert(0, new ListItem("RBTN 1"));
                Rbtnl.Items.Insert(1, new ListItem("RBTN 2"));
                Rbtnl.Items.Insert(2, new ListItem("RBTN 3"));
                Rbtnl.SelectedIndex = 0;
                
                //Text box
                Txt = new TextBox();
    
                //Refill the settings
                if (!string.IsNullOrEmpty(_ddlValue))
                {
                    Ddl.SelectedValue = _ddlValue;
                }
                if (!string.IsNullOrEmpty(_rbtnValue))
                {
                    Rbtnl.SelectedValue = _rbtnValue;
                }
                if (!string.IsNullOrEmpty(_txtValue))
                {
                    Txt.Text = _txtValue;
                }            
            }
    
            /// <summary>
            /// Applies the child controls
            /// </summary>
            protected override void CreateChildControls()
            {
                base.CreateChildControls();
    
                #region Add the controls to the section
    
                //Title to the web part
                this.Title = "Extended Settings";
    
                //Add the contorls so that they show up on the screen
                Ltrl = new Literal();
                Ltrl.Text = "<b>Dropdown Selection</b><br /><br />";
                this.Controls.Add(Ltrl);
                this.Controls.Add(Ddl);
    
                Ltrl = new Literal();
                Ltrl.Text = "<br /><br /><b>Radiobutton Selection</b><br /><br />";
                this.Controls.Add(Ltrl);
                this.Controls.Add(Rbtnl);
    
                Ltrl = new Literal();
                Ltrl.Text = "<br /><br /><b>Textbox</b><br /><br />";
                this.Controls.Add(Ltrl);
                this.Controls.Add(Txt);
    
                Ltrl = new Literal();
                Ltrl.Text = "<br /><br />";
                this.Controls.Add(Ltrl);
    
                #endregion
            }
    
            /// <summary>
            /// Fires on the OK/Save is clicked in the tool part pane
            /// </summary>
            public override void ApplyChanges()
            {
                base.ApplyChanges();
    
                //Applies the custom settings to the content query web part
                ExtendedCQWP.ExtendedCQWP _parentWebPart = (ExtendedCQWP.ExtendedCQWP)this.ParentToolPane.SelectedWebPart;
                if (_parentWebPart != null)
                {
                    //Applies the control settings
                    _parentWebPart.DdlValue = Ddl.SelectedValue;
                    _parentWebPart.RbtnlValue = Rbtnl.SelectedValue;
                    _parentWebPart.TxtValue = Txt.Text;
    
                    //Applies the settings
                    _parentWebPart.ApplyChanges();
                }
                
            }
    
            #endregion
            
        }
    }
    
  5. For "ExtendedCQWP" add a reference of Microsoft.Sharepoint.Publishing and the code is given below.

    #region System
    
    using System;
    using System.ComponentModel;
    using System.Web;
    using System.Web.UI;
    using System.Web.UI.WebControls;
    using System.Web.UI.WebControls.WebParts;
    using Microsoft.SharePoint;
    using Microsoft.SharePoint.WebControls;
    using System.Collections.Generic;
    using Microsoft.SharePoint.WebPartPages;
    
    #endregion
    
    namespace CustomContentQueryWebPart.ExtendedCQWP
    {
        /// <summary>
        /// Sample extended Content Query Web Part
        /// </summary>
        [ToolboxItemAttribute(false)]
        public class ExtendedCQWP : Microsoft.SharePoint.Publishing.WebControls.ContentByQueryWebPart
        {
            #region Properties
    
            /// <summary>
            /// Txt Value
            /// </summary>
            public string TxtValue { get; set; }
    
            /// <summary>
            /// Radio button Value
            /// </summary>
            public string RbtnlValue { get; set; }
    
            /// <summary>
            /// Txt Value
            /// </summary>
            public string DdlValue { get; set; }
    
            #endregion
    
            #region Methods
    
            /// <summary>
            /// Create Child Controls
            /// </summary>
            protected override void CreateChildControls()
            {
                base.CreateChildControls();
            }
    
            /// <summary>
            /// Override the get tool part
            /// </summary>
            /// <returns></returns>
            public override ToolPart[] GetToolParts()
            {
                List<ToolPart> _toolParts = new List<ToolPart>(base.GetToolParts());
                _toolParts.Insert(0, new CustomToolPart.ExtendedCQWPToolPart(DdlValue, RbtnlValue, TxtValue));
                return _toolParts.ToArray();
            }
    
            /// <summary>
            /// Applies the changes
            /// </summary>
            public void ApplyChanges()
            {
                this.Title = string.Format("DDL : {0}, Rbtn : {1}, Txt : {2}", DdlValue, RbtnlValue, TxtValue);
            }
    
            #endregion
        }
    }
    
  6. I renamed the title in element.xml so the web part show with title "Custom Content Query Web Part".
  7. Edit the newly added webpart.

    /li>
  8. The right side of the tool pane will show like the below given picture. Make the modification as you want.


  9. On applying or saving the settings my code will set the title concatenating all the 3 values.


This was the simplest way of showing how to add the custom parameters in the tool pane. We can do many more things with it not just setting the title. You can also go through one of my old blog Override Content Query Webpart to do on the run filteration to get an idea of what else can be done with extending the classes.
Hope the blog helped you, please comment if you have any queries. I will be very much happy to answer them.